Chestnut financiers

Chestnuts are so underrated, and they shouldn’t be because they are delicious! Boiled, roasted or candied, chestnuts taste amazing, with their soft, creamy and delicate texture. If you want to make me happy over the holidays (or any time, really), get me a box of candied chestnuts! They are to die for!

I’ve been wanting to make a dessert out of chestnut spreads for some time now, but never really got to it. Last year, I made all these plans for a homemade Mont-Blanc. Spent weeks researching for the perfect recipe, planning, buying all the right ingredients, and everything. In the end, I got lazy and my plans went nowhere…

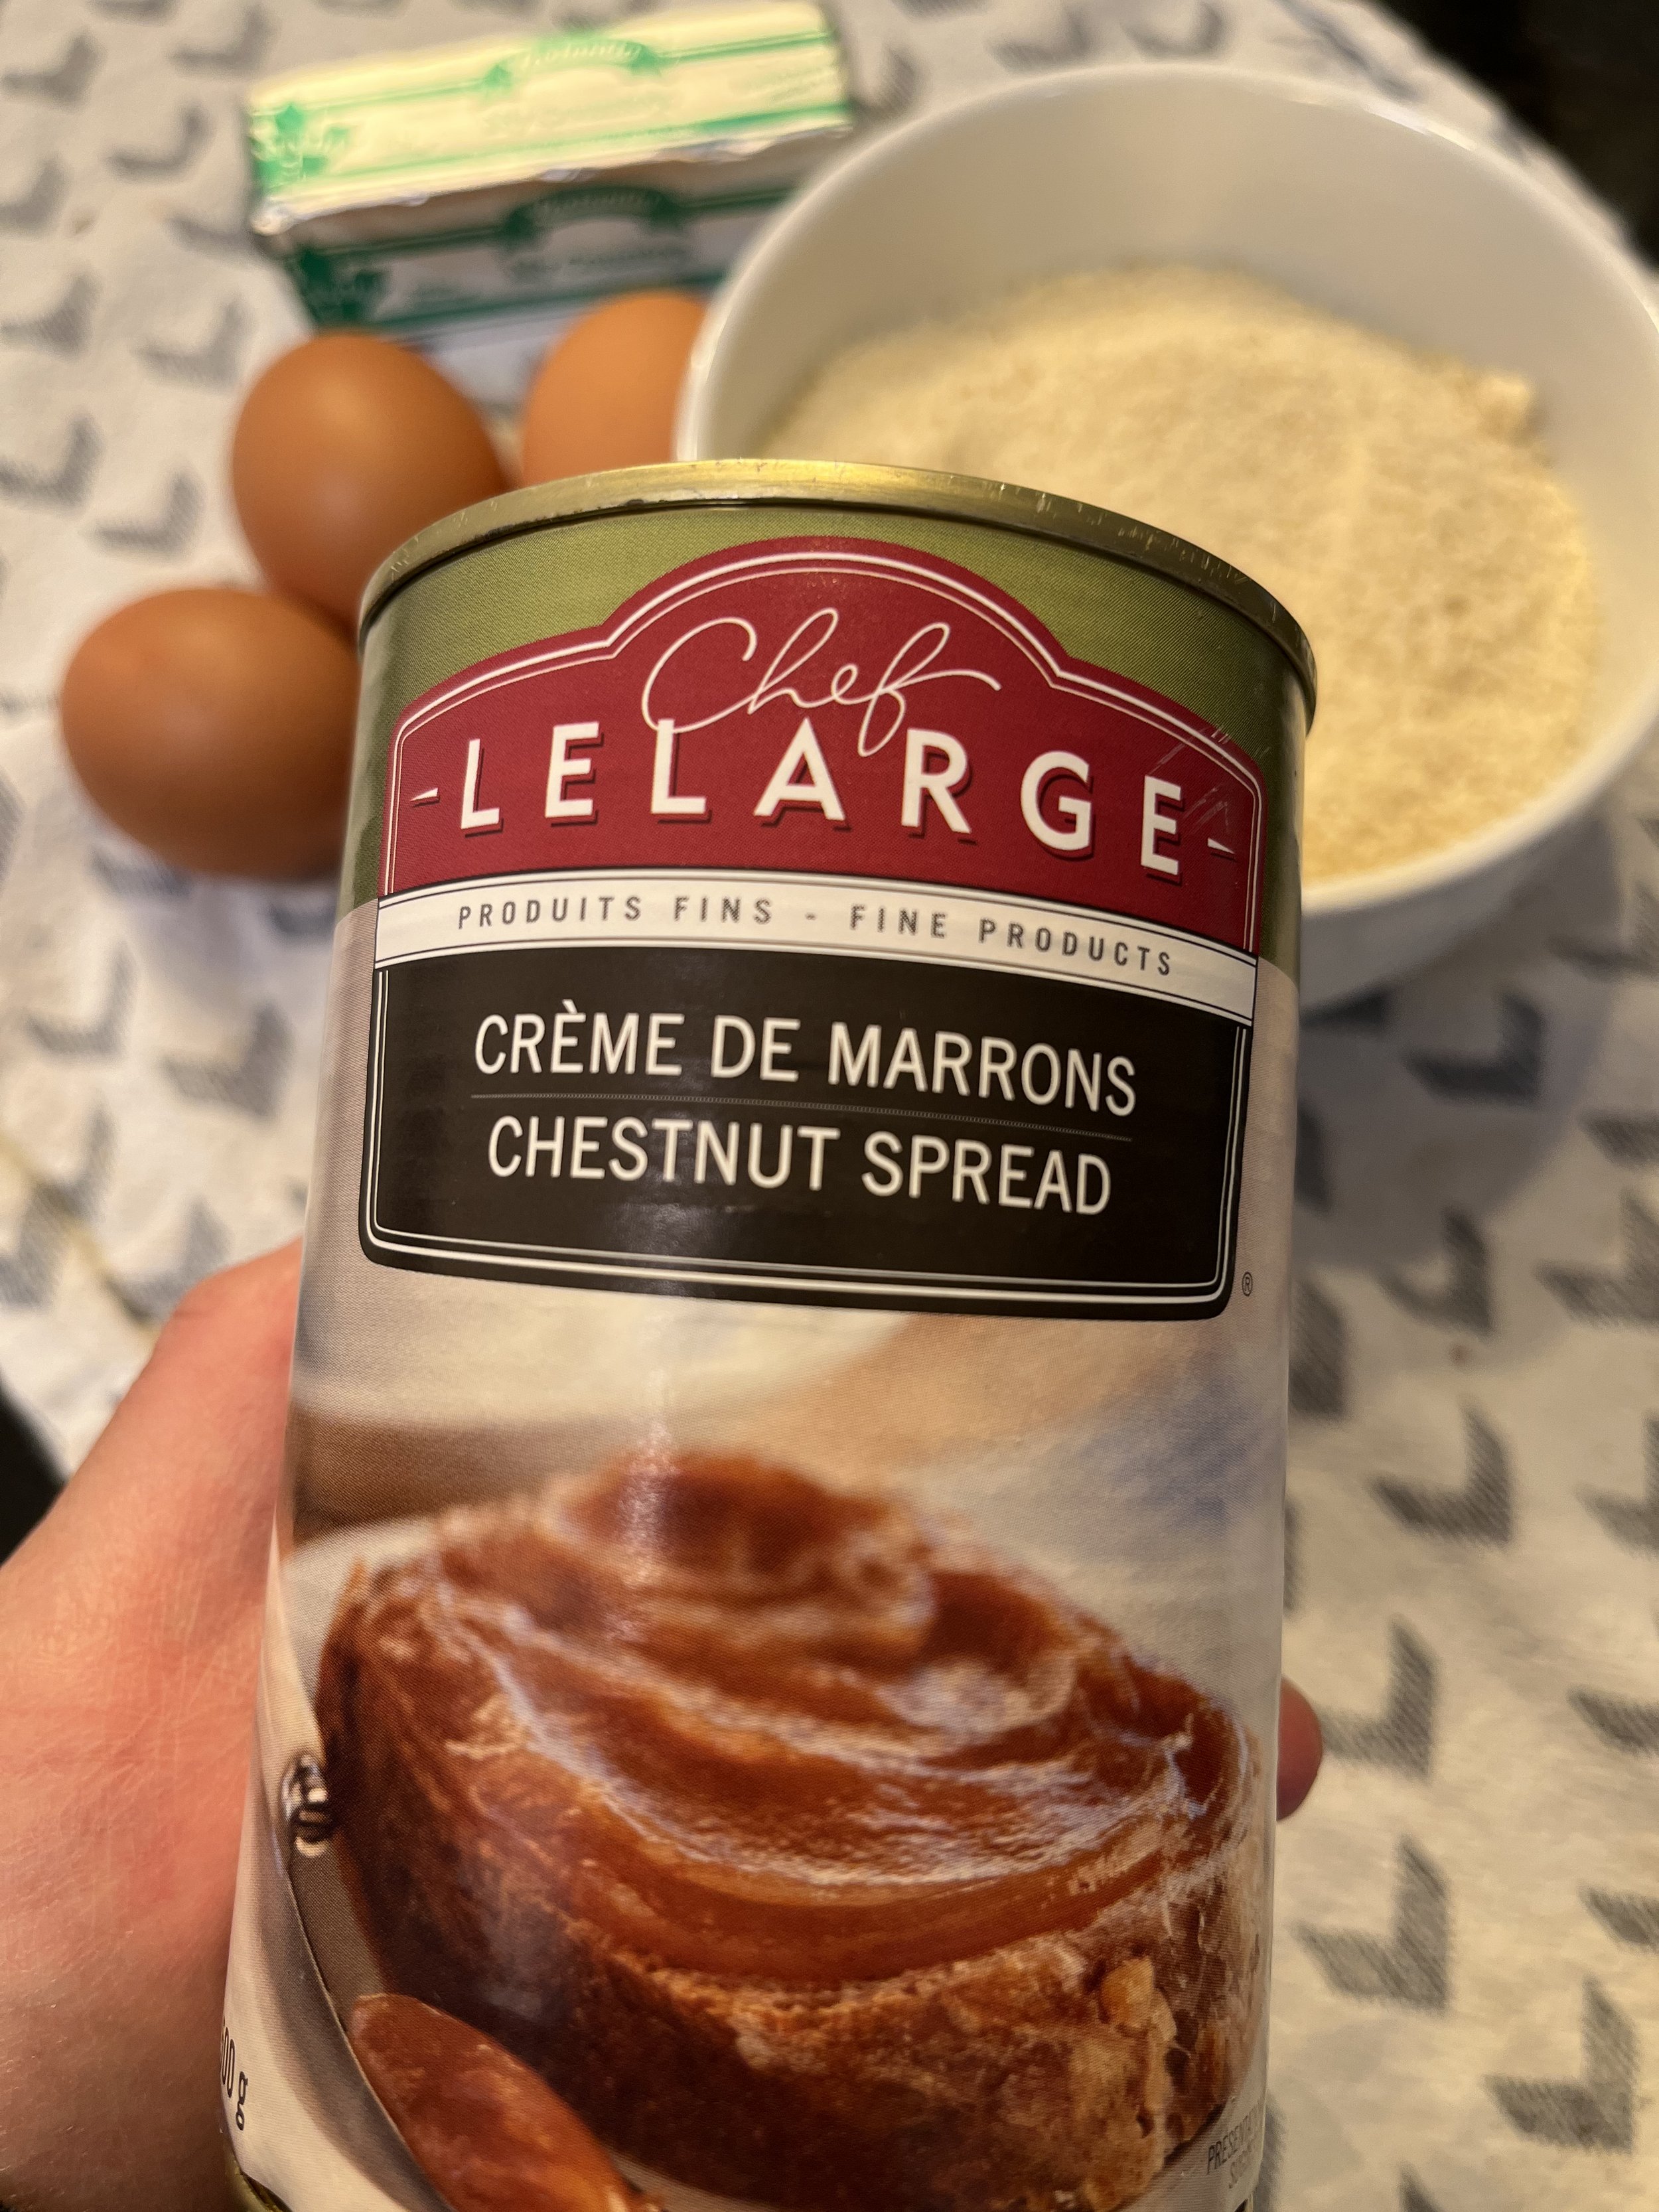
This year, I stumbled on a few cans of chestnut spread while grocery shopping and took it as a sign that I should pull through, this time. Not with the Mont-Blanc, though. That’s way too time consuming. I wanted to bake something simple but tasty. My personnal favorite snacks are financiers, so I decided to give chestnut financiers a try, to see what they taste like. I must say, the result is more than satisfactory! It also helps that this cake is beyond easy to prepare!

Chestnut financiers

Makes approx. 15

ingredients

  • 2 cups ground almonds

  • 500gr chestnut spread (1 can)

  • 4 eggs

  • 6 tbsp butter

  • salt

directions

  1. Preheat oven at 320.

  2. Prepare muffin pan with liners.

  3. Melt the butter and set aside.

  4. Separate eggs yolks from the egg whites.

  5. In the bowl of an electric mixer fitted with the whisk attachment, beat the egg whites with a pinch of salt until stiff peaks form, and set aside.

  6. Still with the electric mixer, mix the egg yolks with the chestnut spread until combined.

  7. Add the butter, then the ground almond, mixing well after each addition.

  8. Incorporate the egg whites to the mixture, and mix delicately with a spatula.

  9. Fill the muffin cases 2/3 full and bake for 30 to 35 minutes.

  10. Let the cakes rest in the tin for 5 minutes before transferring them to a rack to cool completely.

And that’s it! How simple was that? The cakes are moist, slightly crumbly, with a sweet but delicate chestnut taste. I dusted the cakes with some icing sugar only to make them pretty, but that’s what I like about financiers (aside from being super easy to make) : they don’t need icing or frosting.

Enjoy!

Almond Pithivier

It’s been a while since I posted anything. I must admit that I’ve been stuck in a rut lately and felt greatly uninspired. I felt lazy and only wanted to stay in familiar and safe territory. But a week or two ago, I decided to give myself a big kick in the butt and start exploring new recipes. I still had a great deal of almond flour in my pantry, as well as puff pastry sheets in the fridge, so I decided to make my own pithivier.

Full disclosure, I am still being lazy here as I used store bought puff pastry sheets instead of making my own, but I know my limitations and puff pastry is one of them. Though I am all about exploring new territory, I am not into setting myself up for failure.

Anyhow. What’s a pithivier, you ask? It’s originally a French pastry made of puff pastry stuffed with a sweet filling, usually frangipane, but it later diversified, with different sweet and savory fillings. In my opinion, however, the almond pithivier is the only one that matters. It’s basically very simple to make but its appearance makes it look intimidating and we assume it’s a hassle to prepare. The key ingredient, really, is dexterity.

IMG_5208.jpg

Almond pithivier

Makes 8 portions

Ingredients

  • 2 sheets of puff pastry, thawed

  • 1/2 cup butter, room temperature

  • 2/3 cup sugar

  • 1 egg and 2 yolks, separated

  • 1 1/3 cup almond flour

  • 2 tbsp flour

  • 2 tbsp rum

  • powdered sugar, for dusting

directions

  1. Line 2 baking trays with parchment paper.

  2. Roll out the puff pastry sheets and cut out a disk in each one. One disk has to be larger than the other. Mine measured 20 and 15 cm. Place each disk on a tray and refrigerate for approximately 20 minutes.

  3. While the disks chill in the fridge, prepare the almond cream.

  4. In the bowl of an electric mixer fitted with the paddle attachment, cream the butter and sugar until pale and fluffy.

  5. Beat in the egg and one yolk, until combined.

  6. Add the rum, then than flour and almond flour. Mix until combined.

  7. Remove the disks from the fridge.

  8. Spoon a generous amount of almond filling at the center of the larger disk, leaving a 5 cm border around the edge. The filling must form a little mound at the center.

  9. Beat the remaining egg yolk in a small bowl with a little bit of water, and brush it around the border.

  10. Lay the smaller disk on top of the filling and press its borders down.

  11. Lift the lower disk’s border up, and carefully fold it over the smaller disk. Make small folds, pinch them between your fingers and press them down, like you would a pie crust.

  12. The filling has to be sealed inside the puff pastry sheets.

  13. With a sharp knife, make a small hole in the center.

  14. Put the pithivier in the fridge for approximately 20 minutes.

  15. In the meantime, preheat the oven at 400°.

  16. Remove the pithivier from the fridge and brush the egg yolk over its surface.

  17. With the tip of a sharp knife, draw arcs in the top pastry sheet, starting at the center and going toward the outer edge. Make sure you’re not piercing through the sheets, though!

  18. Make sure the filling is sealed under the puff pastry and then put it in the oven for 15 minutes, or until puffed and golden.

  19. Turn the heat down to 350° and continue baking for 35 to 40 minutes.

  20. Remove the pithivier from the oven, turn the heat back up to 400° and dust the pastry with powdered sugar. Bake for another few minutes (4-5 minutes, tops), until the sugar has caramelized and the pastry is glossy.

  21. Remove from the oven and transfer to a cooling rack.

For extra indulgence, I like to eat my pithivier with a few spoonfuls of good vanilla ice cream!

IMG_5212.jpg

Variations

The rum definitely gives the pastry some personality, but if you don’t like the smell or taste of it, just leave it out, but use some almond extract instead (1/2 tsp), for extra flavor.

From then on, use whatever filling you like. Almond is a super versatile flavor that can be combined with any fruit. Pear, apple, peach are all winners.

Also, you cannot lose with chocolate chips!

Have fun and enjoy!

Frangipane

I am obsessed with almond flavors and that is why Frangipane is one of my favorite fillings in the world. What is frangipane? Simply put, it’s a creamy almond filling made with butter, sugar, almond flour and eggs that’s often used in pastries like croissant and tarts. And unlike marzipan, frangipane cannot be eaten raw and must be baked to be enjoyed, because there’s egg in it.

I always assumed something so delicious must be very difficult to make but I quickly realized how wrong I was. Frangipane is super easy to prepare and in no time, no less!

This is the sort of recipe that is always useful to have handy if you want to make a quick but flavorful dessert or just want to elevate your croissant experience.

IMG_3264.jpg

Frangipane

Makes 1 cup

ingredients

  • 3/4 cup almond flour

  • 1/4 cup sugar

  • 1/4 cup unsalted butter, room temperature

  • 1 egg

  • 1/8 tsp almond extract (optional)

  • 1 tbsp flour

directions

  1. In the bowl of an electric mixer fitted with the paddle attachment, mix almond flour, butter and sugar until light and fluffy. Scrape down the bowl if necessary.

  2. Add the egg and mix until incorporated. Add the almond extract if using.

  3. Add the flour and mix until just combined.

And that’s it! You now have frangipane! Scoop a spoonful on you puff pastry sheet or pour it in your pie crust, bake according to their respective recipes and there you go! A delicious almond flavored dessert! I know it doesn’t look appetizing in my picture but trust me, when baked, it’s amazing!

Variation

For something different, use ground pistachios instead of ground almonds. In this case, I highly recommend that you use the almond extract to enhance the flavors a bit.

Enjoy!


Biscuit breton

The simplest things in life are usually the best, and this also applies to cookies. My favorites are plain butter cookies, also known as “biscuit Breton” in French. Crunchy, buttery, with a mouthwatering almond aroma. That’s all you need for a deeply satisfying experience.

What I like most about biscuits breton, aside from the fact that they are addictively delicious, is that they can also be used as pie crusts! Pie crusts (pâte brisée) have been my Achilles heel for a long time. Aside from the fact that my kitchen lacks the proper counter space to roll out dough, I have never been able to produce a decent pie crust. More frustratingly is the fact that every one around me keep insisting on how easy it is to make a pie crust… mine are always too soft or too hard, or just plain awful. Then, one day, I remembered that I used to buy little raspberry/custard tartlets not far from my workplace, and they were made with a biscuit breton and not traditional pie crust. I made tiny lemon tarts with biscuit breton over last year’s holidays and they were a huge success! This has since become my go-to pie crust recipe as well as my quick fix anytime I’m in the midst a cookie craving.

This recipe is so simple and takes no time to prepare.

IMG_7724.jpg

Biscuit breton

Makes approx. 16

ingredients

  • 1 cup flour

  • 1/2 cup + 2 tbsp unsalted butter, room temperature

  • 2/3 cup icing sugar

  • 1 egg yolk

  • 1/3 cup ground almonds

  • 1/4 tsp vanilla extract

  • 1/8 tsp almond extract

  • 1/4 salt

  • optional : a few sliced almond

directions

  1. In the bowl of an electric mixer fitted with the paddle attachment, mix sugar and butter at medium speed, until light and fluffy, 2 minutes.

  2. Add egg yolk, vanilla and almond extracts and mix until combined.

  3. Add the ground almonds, and mix until combined.

  4. Add the flour and salt, and mix until combined.

  5. Place the dough in a wrapper and roll it into a sausage shape of the size of your choice. I usually like a diameter of approx. 4 or 5 cm.

  6. Refrigerate the dough for about 2 hours.

  7. Preheat the oven at 325 and place parchment paper on a large cookie sheet.

  8. Remove the dough from the refrigerator, place it on a cutting board and cut into slices of equal thickness. I find that 5 mm (1/4 inch) is what I prefer.

  9. Put the slices on the prepared cookie sheet. If you find that the dough has softened quite a bit because you kitchen is too hot, you can put the sheet in the fridge for about half an hour. Optional step : you can put an almond slice in the middle of each cookie before putting them in the oven.

  10. Bake for 20-22 minutes, until golden brown.

  11. Let the cookies cool down on the sheet before transferring them to a cooling rack.

And that’s it! You now have delicious, buttery, almondy, crunchy cookies in no time, and if you’re anything like me, you’ll end up gobbling them down in no time.

Enjoy!

Easy amaretti cookies

A few weeks ago, I woke up with a hankering for something sweet and nutty. Of course, I had nothing that would remotely fit my cravings in my pantry and though I normally enjoy baking, I really wasn’t in the mood for it that time. Work has been stressful and lately, all I want to do during my time off is nap. In the end, my gluttonous belly got the better of me and I skimmed kitchen cabinets, looking for something very easy and quick to bake, just to satisfy my needs and go back to bed.

I had bags and bags of ground almonds and as I was holding them in my hands, wondering why I bought so many of it, a light bulb lit up in my head. Almond cookies! More specifically, amaretti cookies. I love these. It’s like eating sweet, soft, chewy and moist balls of almond paste. There is a little Italian bakery not so far from my home, with an amazing display of various amaretti cookies of so many different flavors. For special occasions, I would often request to be given one of each of their cookies (as well as a few cannolis).

As it turned out, these cookies are super easy to make, so I made a small batch. They were all gone within 2 days.

IMG_2546.jpg

Easy amaretti cookies

Makes approx. 15-18 cookies

ingredients

  • 2.5 cups ground almonds

  • 3/4 cups granulated sugar

  • 1/8 tsp salt

  • 2 egg whites

  • 1/4 tsp freshly squeezed lemon juice

  • optional: no more than 1/2 tsp almond extract

  • powdered sugar

directions

  1. Preheat oven at 300. Stack 2 cookie sheets one on top of the other (this prevents the cookie bases from browning too much) and line with parchment paper.

  2. Fill a small bowl with powdered sugar. Set aside.

  3. In a bowl, mix together ground almonds, salt and sugar.

  4. In the bowl of an electric mixer fitted with the whisk attachment, whisk eggs whites with lemon juice until soft peaks form.

  5. Add egg whites to the almond mixture and knead with your hands, until you obtain a soft, sticky dough.

  6. If you’re using almond extract, this is where you add it. Knead it in the almond mixture, with the beaten egg whites.

  7. Roll cookie dough into 1 inch balls and roll them in the powdered sugar until covered.

  8. Place balls on the baking sheets, one inch apart from each other.

  9. Bake for 30 minutes, until the tops are cracked and the bases are slightly golden.

  10. Let rest on the baking sheets for 5 minutes before transferring on a wire racks, to cool completely.

IMG_2548 (1).jpg

Aren’t they beautiful? This is pretty much what a no-fail cookie recipe looks like. I normally use almond extract in almost all my cakes and cookies but somehow, in this case, I did not feel like it was that necessary, given the amount of almonds used. If you fear that the cookies will not taste enough, add a little bit of almond extract but be careful because too much of it will be overwhelming and unpleasant.

Variations

From now on, you could create whatever variation you like.

For pistachio, replace the ground almond with ground pistachio. This goes for any nut of your choice.

For chocolate, use 2 cups of ground almond and 1/2 of cocoa powder. In this case, I would use a little bit of almond extract, no more than 1/2 tsp so that it doesn’t overwhelm your taste buds.

For lemon, add 1 tbsp of freshly squeezed lemon juice (instead of 1/4 tsp) as well as the zest of 2 lemons.

For espresso, mix 3 tsp of good espresso powder in 1 tbsp of boiling water.

You get the idea.

Now, have fun and enjoy!


Simple butter cookies

Not going to lie. The summer heat as well as the return to work after confinement have been brutal, which explains why I’ve been somewhat apathetic lately, during my free time. I’ve said it again and again, I am not a summer person. And despite all my best effort, making plans, organizing activities, dressing lists of cakes to bake, I usually end up cancelling everything due to the weigh of the summer heat and scorching sun. So this explains why I’ve been MIA for the past few weeks. But, at some point, one must give oneself a good kick in the butt and get moving. Having no more shows to watch on TV is also a great motivator.

Having no AC makes it very difficult to bake during heatwaves. That’s why I’ve been more focused on making ice creams, but I started having a major craving for something rich, buttery, with a bite, that I couldn’t shake off. Nothing fancy. Just something quick and easy to make that doesn’t require me getting dressed to go to the market. My options were limited as I didn’t have any eggs or dairy in my pantry, and I was running low on granulated sugar. I did, however, have lots of butter and flour. Butter cookies were then the first idea that popped in my head and I went with it.

This is as simple as it can get: a 3-ingredient no hassle cookie recipe.

A lot of butter cookie recipe instruct you to roll out the dough and use a cookie cutter. Since I have a small kitchen with very limited counter space, I prefer to roll the dough into a sausage shape and cut it into slices. Though this technique is less messy, it does require more attention to detail as the slices should all be of the same size for the cookies to bake evenly. For this recipe, depending on your preferences, you pick either technique.

IMG_1766.jpg

Simple butter cookies

Makes between 12 and 16, depending on thickness.

ingredients

  • 1 cup butter, room temperature

  • 1/2 cup powdered sugar

  • 2 cups flour


directions

  1. In the bowl of an electric mixer fitted with the paddle attachment, mix sugar and butter at medium speed, until light and fluffy, 2 minutes.

  2. Sift in flour and continue mixing until the mixture forms a dough.

  3. Place the dough in a plastic wrap and roll it into a sausage shape.

  4. Refrigerate for at least an hour.

  5. Preheat oven at 350.

  6. Prepare a large baking sheet with parchment paper.

  7. Remove the dough from the refrigerator and remove the wrap.

  8. Place the sausage-shaped dough on a cutting board and cut into slices approximately 5 mm (1/4 inch) thick.

  9. Place slices on prepared baking sheets and bake for 16 minutes, or until the cookies are golden brown.

  10. Let cool on baking sheets a few minutes before transferring them to a cooling rack.

And that’s it! You now have at least a dozen super buttery, crumbly cookies to satisfy your cravings!

Of course, from now on, there are numerous variations that you could have fun with, like adding chocolate chips, nuts and/or dried fruits, dipping the cookies in chocolate or decorating them with royal icing. If you like coffee flavors, follow this exact recipe, but add a little bit of espresso (2 tbsp of espresso powder dissolved into 1 tsp of hot water) right after step 1. You can also enhance flavors by adding some vanilla or almond extract (1 tsp for vanilla, 1/2 tsp for almond extract).

In my case, since I had some strawberry ice cream in my refrigerator, I decided to make some very decadent ice cream sandwiches! They were amazing. They hit all the right notes.

IMG_1762 (1).jpg

Enjoy!
Pistachio/ almond cupcakes

I love pistachios. I love almonds. And it’s only a matter of time before I incorporated my two favorite nuts into a single cake and the result exceeded my expectations! Full of flavor, nutty, a bit crunchy, dense but moist… And instead of a regular frosting, I opted for icing in this case. A thick, almond-flavored icing. The simplicity of the cake only adds to its appeal. The cake is so pretty it can be served for special occasions and dazzle your guests, or it can be a quick snack and/or breakfast. I chose to bake cupcakes but you can easily bake the batter in a loaf pan if you prefer it that way. In that case, bake for up to 50 minutes.

What I like about this recipe is that the quantities for the dry ingredients can vary depending on what’s available in your pantry. Ideally, you need a total of 2 cups of flour mixture (3/4 cup ground almonds, 3/4 cup ground pistachios and 1/2 cup flour). But, as it turned out, I did not have enough pistachios at the time I wanted to bake the cakes, and I really didn’t feel like going to the grocery store just to purchase that single item. So, I compensated with more ground almonds. The recipe below is the one I made when I didn’t have enough pistachios.

Even though I used less pistachios than almonds, the pistachios’ flavor is strong enough for it to stand out. It also helped that I did not grind the pistachios into a fine flour. Since I like a little bit of crunch, I coarsely ground them so that chunks are in the mix.

IMG_1016.jpg

Pistachio/ almond cupcakes

Makes approx. 16


ingredients

For the cake:

  • 1/2 cup flour

  • 1 cup ground almonds

  • 1/2 cup coarsely ground pistachios

  • 1/2 tsp baking powder

  • 1/4 tsp salt

  • 1/2 cup butter, room temperature

  • 1/3 cup sugar

  • 2 eggs, room temperature

  • Zest from 1 lemon

  • 1 tsp vanilla extract

  • 1/4 tsp almond extract

  • 3 tbsp milk

For the icing

  • 1 cup confectioners’ sugar, sifted

  • 3 tbsp heavy cream

  • 1 tsp almond extract

  • toasted sliced almond for garnish


Directions

  1. Preheat oven at 350 and put cupcake liners in a muffin pan.

  2. In a bowl, sift in the flour and baking powder. Mix in ground almonds, pistachios and salt.

  3. In the bowl of an electric mixer fitted with the whisk attachment, mix sugar and butter at medium speed, until light and fluffy, 2 minutes.

  4. Add eggs and lemon zest. Mix well until smooth.

  5. Mix in vanilla and almond extracts and milk. If the mixture looks a bit curdled, don’t worry.

  6. With a spatula, fold in the flour mixture until well incorporated.

  7. Scoop batter equally into cupcake liners and bake for 20 to 22 minutes, or until a toothpick inserted in the center comes out clean.

  8. Let the cakes rest in the tin for 5 minutes before transferring them to a rack to cool completely.

  9. While the cakes cool, prepare the icing.

  10. In a bowl, mix together the sifted confectioners’ sugar, cream and almond extract until the mixture is smooth. The result should be thick but pourable.

  11. Pour the icing on the cooled cakes with a spoon, until icing reaches the border of the liner, and decorate with sliced almonds on top.

IMG_1015.jpg

And that’s it! The whole process did not take over an hour to prepare and that’s what I like about this recipe. You crave something, you make it in no time and then you eat it. Should not be any harder than that.

Little note : it goes without saying but you must wait until the cakes have cooled completely before pouring the icing on top. If the cakes are still warm, the sugar will melt and the icing will lose some of its texture.

Enjoy!

IMG_1012.jpg

Easy brownies

Brownies are uncontestedly the best comfort food out there. And for that reason, they should not require much time not effort to prepare, because the comfort is needed NOW!

I have tried and tested numerous recipes over the years, and to be frank, almost most of them are great. This one is still my favorite because it requires only one egg, not much flour and can quickly be made in one bowl before being sent in the oven. If you like chewy and crunchy brownies, this recipe is for you.

IMG_1025.jpg

Easy brownies

Makes 16 2” squares

ingredients

  • 1/2 cup butter, melted

  • 3/4 to 1 cup packed brown sugar (the quantity depends on how much of a sweet tooth you are)

  • 1/4 tsp salt

  • 1 egg

  • 2 tsp vanilla extract

  • 1/4 tsp almond extract (optional)

  • 3/4 cup flour

  • 1/3 cup unsweetened cocoa powder

  • 1/2 cup dark chocolate chunks

  • 1/2 cup chopped pecans


directions

  1. Preheat oven at 350.

  2. Line a 8” x 8” baking pan with parchment paper.

  3. In a bowl, mix butter, brown sugar and salt until combined.

  4. Add the egg, vanilla and almond extracts. Mix well.

  5. Sift in the flour and cocoa powder. Stir until incorporated. If not using an electric mixer, use a spatula for this step, it’ll be easier to mix.

  6. Fold in the chocolate chunks and pecan.

  7. Pour batter in the pan, spread it evenly into an even layer.

  8. Bake for 18 minutes.

Let cool a bit on a rack, slice and enjoy!

The cake should be soft and chewy. I prefer by far chocolate chunks to chips because they add some crunch to the dessert but you don’t have any or prefer melted chocolate, use chips. I also use dark chocolate but semi sweet will also do but personally, I find them too sweet. The pecans are there for more crunch and to add some nutty flavor as well.

IMG_1034.jpg

The resulting brownies are a bit thin but I like that!

It took less than half an hour from beginning to end, to make these brownies, and that’s perfect.

Enjoy!

Raspberry spread

I love raspberries. They are beautiful to look at and they taste amazing. In desserts, they play the crucial role of adding some tanginess and freshness, thus preventing the sweetness from being overwhelming. So when ever I make a rich dessert, I tend to try to incorporate raspberries if flavor combos permit it, usually as a spread or coulis.

Since the raspberries are not supposed to be the highlight of the dessert, I never want to waste too much time preparing the spread. This recipe is my favorite because it requires very little effort and time to make. I just prepare it first and set it aside until it’s needed. And, if you have some left over, use it over breakfast, on toast. With peanut butter or salted butter, it is absolutely heavenly.

FullSizeRender.jpg

Raspberry spread

ingredients

  • 400g raspberries (thawed if you only have frozen ones)

  • 1 1/2 tbsp cornstarch

  • 2 tbsp lemon juice

  • 1/3 cup sugar

directions

  1. Puree the raspberries in a food processor. I like to keep the seeds because I enjoy their crunchiness but if that’s not your cup of tea, pour the puree in a sieve, over a bowl, and press down on the raspberries with the back of a spoon.

  2. In a saucepan, add raspberry puree, cornstarch, sugar and lemon juice. Heat over medium-high heat, stirring constantly until the mixture has thickened.

  3. Transfer in a bowl, cover and refrigerate.

That’s it!

Now use it over peanut butter or butter and toast, a cheese cake, panna cotta… it’s there to make what ever you eating pop!

I recently received an order for chocolate cupcakes but with a fruity twist. I immediately thought of raspberries. I baked my usual chocolate cakes, scooped out a tiny hole on top, inserted some of the raspberry spread and piped dark chocolate frosting on top. The cupcakes were dense, moist and rich, which balances well with the raspberries.


Banana bread muffins : the easiest cake in the world

Times are weird and stressful. I’m currently working from home but at the same time I’m trying to keep myself sane and busy with baking, my personal form of therapy. We had a few overripe bananas on our kitchen counter, and since we didn’t want to waste any food, I decided to make banana bread muffins.

This is the sort of recipe that can really be whipped up in no time, requires very little ingredients and is pretty healthy! Whenever I’m tired of eating bananas but don’t want to waste them, I immediately turn them into a cake. They’re naturally sweet and are the perfect breakfast, snack or late night indulgence! No effort whatsoever was put into these muffins, everything was mixed into one bowl, no electric mixer was required, and in a matter of a few minutes, everything was in the over, baking. That, as well as how delicious the cakes are, is what I like about them. So here it is, the recipe for the easiest cake in the world!

Pain bananes3.jpg

Banana bread muffins

Makes 12 cakes

ingredients

  • 3 ripe bananas

  • 1 1/2 cup flour

  • 1 tsp baking powder

  • 1 tsp baking soda

  • 1/2 tsp salt

  • 1 tsp vanilla extract

  • 1/4 cup sugar (optional)

  • 1 egg

  • 1/3 cup vegetable oil

directions

  1. Preheat oven at 350 and put cupcake liners in the muffin pan.

  2. In a large bowl, mash the bananas with a fork until they reach the desired consistency (I like chunks).

  3. Mix in the vegetable oil and vanilla.

  4. Add the egg and whisk until well blended.

  5. Sift in the flour, baking soda, baking powder and salt. Mix well with a spatula.

  6. Optional : the cake should be naturally sweet thank to the bananas, but if you have an especially sweet tooth, you could add 1/4 cup of sugar and mix well.

  7. With an ice cream scoop, fill the liners equally.

  8. Bake for 20 to 22 minutes, or until a toothpick inserted in the center comes out clean.

  9. Let the cakes rest in the tin for 5 minutes before transferring them to a rack to cool completely.

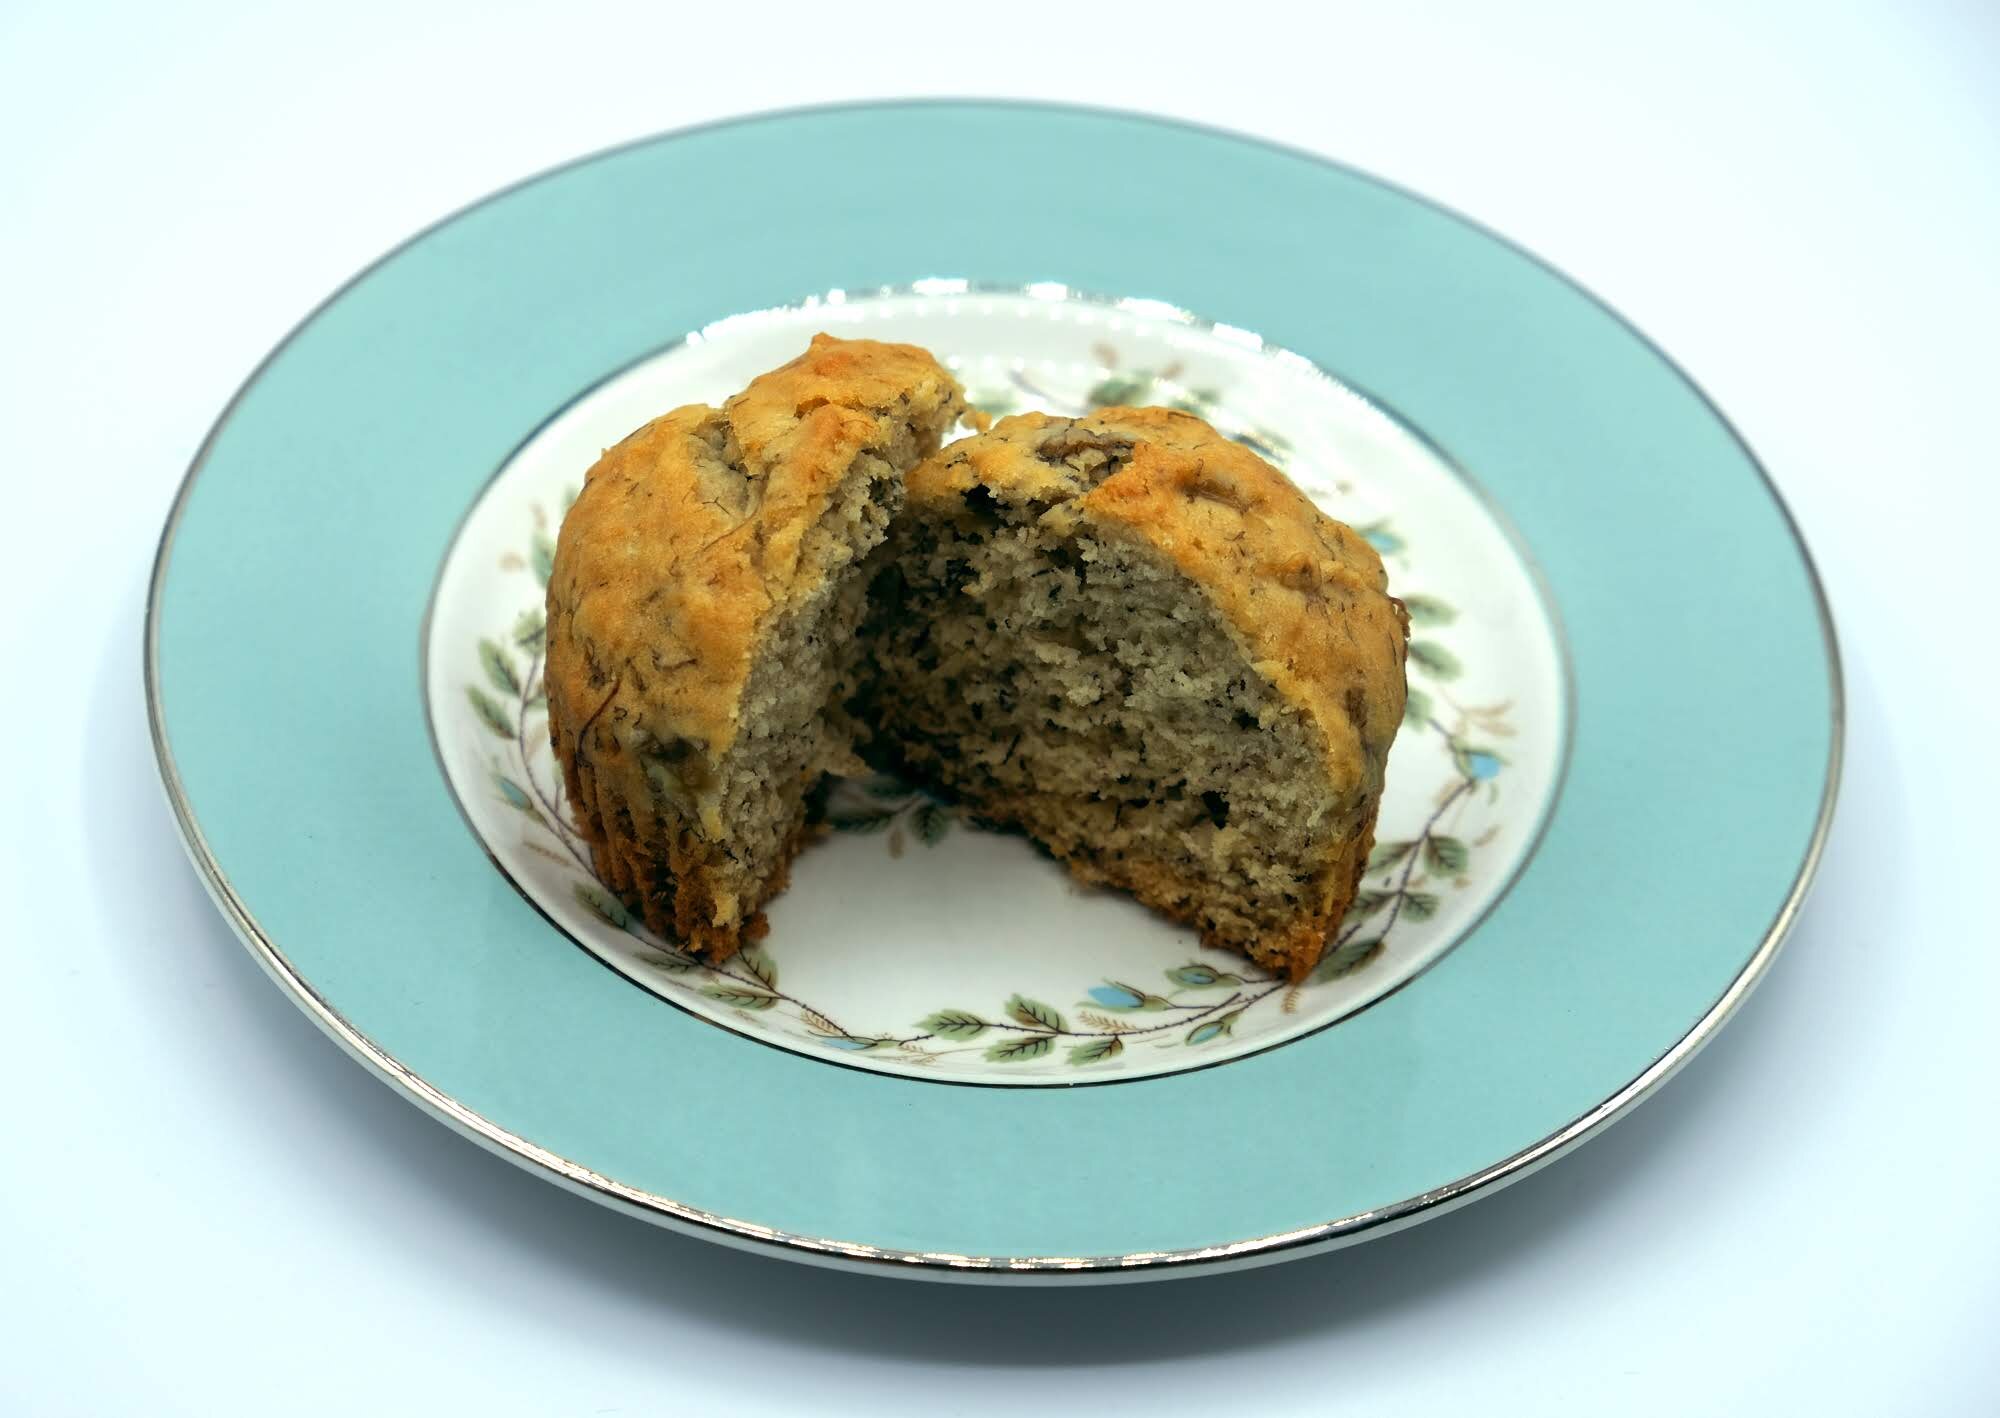
That’s it! In less than half an hour, I was already snacking on delicious, super moist banana muffins! This recipe is the most basic one, but of course, you could add anything to it that you like, such as chocolate chips, dried fruits or nuts! Do you like cinnamon? Add some! Love, love, love chocolate? Sure, replace 1/2 cup of flour with good cocoa powder! This is what’s so great about this recipe : you could let go and create or customize as you wish!

Painbananes 2.jpg

Look how yummy the cake looks!

So next time, don’t throw your bananas away; turn them into a super nutritious snack or breakfast or dessert!

Enjoy!

Chocolate / black sesame cookies

I can’t really explain it but I am currently obsessed with black sesame seeds right now. I love the color, the taste, the texture, and all I want to do is make desserts with them. I decided to start off easy and bake cookies. I always thought that something was missing from chocolate chip cookies but I never really could pinpoint what exactly. I crave chocolate chip cookies but always end up disappointed, expecting something more. Who knows, maybe the nutty, slightly bitter taste of the black sesame seed is the missing link. Over the week-end, I decided to find out once and for all.

This recipe below is my first attempt at combining black sesame with chocolate cookies. I found it quite satisfying and the people I shared the cookies with really seemed to enjoy them. The cookies in themselves are not very pretty but they are tender and chewy, just how I like them, and the chocolate chunks bring a much welcome crunch to each bite!

IMG_7601.jpg

Chocolate / black sesame seed cookies

Makes approx. 24 cookies

ingredients

  • 1 2/3 cups flour

  • 1/3 cup dutch-processed cocoa powder

  • 1/3 cup finely ground black sesame seeds

  • 3/4 tsp baking powder

  • 1/4 tsp baking soda

  • 1/2 tsp salt

  • 1/2 cup (1 stick) butter, room temperature

  • 3/4 cup packed brown sugar

  • 1/3 cup granulated sugar

  • 2 eggs

  • 1/2 tsp vanilla extract

  • 1/8 tsp almond extract

  • 1/2 tsp soy sauce

  • 1/2 cup dark or semisweet chocolate chips

  • 1/2 cup dark or semisweet chocolate chunks

  • black sesame seeds for topping

directions

  1. Preheat oven at 350 and cover cookie sheets with parchment paper.

  2. In a bowl, sift together all the dry ingredients: flour, cocoa powder, ground black sesame seeds, baking powder, baking soda, salt.

  3. In the bowl of an electric mixer fitted with the paddle attachment, mix sugar and butter at medium speed, until light and fluffy, 2 minutes.

  4. Add eggs, vanilla extract, almond extract and soy sauce. Mix until incorporated.

  5. Add the flour mixture and mix at medium-low speed, until incorporated. Scrape down the sides of the bowl occasionally.

  6. Fold in the chocolate chips and chunks with a spatula.

  7. With a 1.5 tbsp cookie scoop, or a medium cookie scoop, scoop out balls of dough of approximately 1 to 1.5 inch in diameter.

  8. Place the dough on the cookie sheet, about 2 inches apart.

  9. Press the balls of dough down a bit, to facilitate the spreading, and sprinkle some sesame seeds on top.

  10. Bake for approximately 12 minutes.

  11. Leave the cookies on their cookie sheet for a few minutes before transferring them to a cooling rack.

And that’s it! I did find the cookies very enjoyable but I still feel like the sesame flavor did not shine enough. In the future, I’ll tweak the recipe a bit, and I might try using black sesame paste instead of simply powder. I’ll also have to find a way to make the cookies look a little prettier because these look like weird little sesame paddies instead of cookies. I don’t know what happened!

They taste good, though! If you’re into dry crunchy cookies, look elsewhere because I am all about chewy ones! Though they don’t look the part, these are very tender, with a good bite. I also love combining chocolate chips with chocolate chunks for some texture. Chunks in chewy cookies are simply the best!

Enjoy!

IMG_7595.jpg


Lemon/blueberry mille-feuilles and pistachio/raspberry tartlets

I made a few little pastries for our office Christmas party, and since a lot of people have since asked me for the recipes, I decided to share them in a blog post.

I wanted to make something easy, but pretty, and most importantly tasty! I usually do not have that much time to whip something up after work and supper, so these desserts were just perfect! I made mille-feuilles with lemon curd and glazed blueberries on top, as well as little tartlets with pistachio frosting and raspberries. Ideally, the lemon curd and the pistachio frosting should be made in advance, so that all you’re left to do is bake the puff pastry and assemble everything! Both mille-feuilles and tartlets were made with sheets of puff pastry to save time. To save even more time, I bought sheets of frozen puff pastry. Yes, I could make my own, but when it comes to puff pastry, I prefer to buy it for 2 reasons : I save tons of time because puff pastry is a hassle to make and most importantly, home-made puff pastry requires A LOT of butter, and that stuff is super expensive! So store-bought it is

Anyways, here are the instructions !

04FE5563-7195-4460-9719-4362FD254388.jpg

Lemon/blueberry mille-feuilles and pistachio/raspberry tartlets

Makes around 20 mini pastries

Ingredients

  • 1 cup fresh raspberries

  • 1 box of 2 puff pastry sheets, thawed

  • 4 tbsp sugar

Glazed blueberries

  • 1 cup blueberries

  • 1 tbsp lemon juice

  • 2 tbsp powdered sugar

Lemon curd

  • Click here for recipe

Pistachio frosting

  • Click here for recipe


directions

Puff pastry

  1. Preheat oven at 375.

  2. Unroll a sheet of puff pastry and cover evenly the surface with 1 tbsp of sugar.

  3. Turn the sheet over and cover the other surface with 1 tbsp of sugar.

  4. Proceed the same way with the other sheet of thawed puff pastry.

  5. Put the sheets in the freezer for 10 minutes.

  6. Cut the sheets into the desired shapes. I chose 2”x5” rectangles, 2”x2” squares and 2” circles.

  7. Put parchment paper on a cookie sheet and transfer the cut puff pastry onto the cookie sheet.

  8. To prevent the puff pastry from puffing up to much (we want them to stay super thin), put parchment paper on top of the puff pastry, and place at least another baking sheet on top. In my case, I bought a set of 3 baking sheets of 3 different sizes. I used the biggest one for the puff pastry and put the 2 smaller ones on top.

  9. Bake for 20 minutes.

  10. Remove the cookie sheets and parchment from the top of the puff pastry and continue baking for approximately 10 minutes. This step allows for the sugar on top of the puff pastry to caramelize a bit.

  11. Keep an eye on the puff pastry because each shape will bake at different speed. Have a cooling rack ready, and remove each piece one by one as they appear done and uniformly brown.

  12. Let the puff pastry cool down completely before assembling.

Berries

  1. Wash the berries thoroughly and dry them.

  2. Set the raspberries aside.

  3. Put the blueberries in a large bowl and cover them with lemon juice.

  4. Mix them carefully with the powdered sugar, making sure that all the berries are completely covered with sugar.

  5. Set them aside, either on the counter or uncovered in the fridge.

Assembling the lemon/blueberry mille-feuilles

  1. Transfer the lemon curd into a piping bag, with a round tip (I used a Wilton W5569).

  2. Take 2 pieces of puff pastry, making sure they are the same size. I used the square shape in this case.

  3. Pipe the curd on one pastry sheet, and spread a tiny bit of curd at the enter of the other.

  4. So now you have a sheet of puff pastry with piped lemon curd on top (sheet A) and a sheet of puff pastry with a little bit of lemon curd spread on its center (sheet B).

  5. Place sheet B on top of sheet A, curd side up.

  6. Carefully place blueberries on top of sheet B. The spread lemon curd ensures that the blueberries don’t move and stay in place.

Assembling the pistachio/raspberry tartlets

  1. Transfer the pistachio frosting in a piping bag. I don’t really remember which piping tip was used, but a star-shaped tip like a Wilton 4B or a Wilton 6B will do the trick.

  2. In this case, I used the rectangular and the round puff pastry.

  3. Apply frosting on one surface and then decorate with raspberries.

And that’s it! Of course, you could make lemon/blueberry tartlets and pistachio/raspberry mille-feuilles as well! Which I did, a bit, since I had some leftover ingredients afterwards. I had fun mixing things up a bit!

The pastries were a hit at the office Christmas party, and their colors were on point also! They’re great because they are not too heavy or too filling, and the lemon as well as the raspberries provide a much needed freshness in the palate!

This is a super easy dessert to prepare, as long as you plan ahead!

Enjoy!

Pistachio frosting

As I have very often mentioned, I love, love, love pistachios! If I want a fancy dessert, chances are that I will resort to using pistachios because not only do they taste amazing, but they also provide a beautiful dash of green color. This works particularly well if I want to make something special for Christmas. Add cranberries or raspberries, and you are set!

I have looked long and hard for a frosting recipe that will not diminish in any way the color nor the taste of this amazing nut, and I think I’ve found it! It requires some pistachio paste, so I recommend that you make it before hand to save some time. For how to prepare pistachio paste, click here.

pistachio frosting (1).jpg

Pistachio frosting

Makes about 1 1/2 cups

ingredients

  • 1/2 cup unsalted butter

  • 1/4 cup powdered sugar (more if needed)

  • 3/4 cup pistachio paste

  • Pinch of salt

directions

  1. In the bowl of an electric mixer fitted with the paddle attachment, combine butter and powdered sugar at medium/high speed, until the mixture is pale and fluffy. About 2 or 3 minutes.

  2. Add the pistachio paste and a pinch of salt, and continue mixing at medium speed. Add more powdered sugar if the mixture is not as sweet as you would have liked or if it doesn’t have the consistence that you desire.

  3. Scrape the sides of the bowl with a spatula if needed, and mix at high speed for a minute or two.

And that’s it! Your pistachio frosting is done and it should have kept its green color! If you don’t need right away, you can store it in an air-tight container, in the fridge, for up to a week. What’s great with this frosting is that it’s not too sweet, and you don’t lose any of the pistachio’s flavor.

Enjoy!

Pistachio paste

I’m going to quickly go over pistachio paste here because it serves an integral part of several desserts, including ice creams and frosting.

Pistachios are my favorite nuts. They are beautiful and super tasty! But sooo expensive! Anyways, as mentioned above, pistachio paste acts as a base for pistachio ice cream but also for frosting. So before I write about either one of them, I’ll share a recipe for making the paste. You could purchase ready-made pistachio paste but if you need it right away, you can make it yourself in no time at all, and really, it’s really not that hard. By the way, this recipe works for other nuts as well. If you want hazelnut paste, just follow the recipe below and, of course, substitute the pistachios for hazelnut! The paste could also be used as a spread if you are tired of the good old peanut butter!

pistachio paste.jpg

Pistachio paste

Makes about 2 cups

ingredients

  • 2 cups pistachios (preferably blanched and peeled, for a brighter, greener color)

  • 3 tbsp water

  • 1/2 cup powdered sugar

  • 1/2 cup finely ground almonds

  • Pinch of salt

  • 1/8 tsp almond extract

directions

  1. In a food processor, grind the blanched and peeled pistachios until you obtain an oily and pasty substance. This step may require a few minutes.

  2. Add the powdered sugar, ground almonds and pinch of salt, and continue processing.

  3. Add the water and almond extract, and continue running the food processor until the mixture is creamy and soft.

And that’s it! You’ve got pistachio paste! If you don’t need it right away, you can store it in an air-tight container, in the fridge for up to 2 or 3 weeks, but seriously, it never lasts that long!


Lemon curd

I love lemons. To me, they are synonym to brightness and freshness. They alleviate any meal and/or desserts they are added to. So, when I want to make a light and not too sweet dessert, I always turn to lemons. And lemon custards are my favorite things to prepare because they can be eaten alone, with a simple cookie or wafer on the side, or they can be added to tarts, creams, cakes, and the list goes on and on! Lemon curd is super easy to whip up and is a life-saver!

My favorite recipe comes from Patrice Demers, one of the best pastry chefs around, and certainly the best one in Montreal. If you speak French, I highly recommend that you check out his books, La Carte des Desserts, Les Desserts de Patrice and Parcours Sucré. The recipes look intimidating at first but don’t let appearances discourage you! Individually, each recipe is surprisingly easy to prepare and the chef makes clear and concise instructions as to how to assemble the desserts so they look original professionally made. His books, among others, have become my baking bible.

Back to the topic at hand, lemon curd. The important thing to know here, is that it must be prepared at least one day before. So plan ahead and accordingly!

Curd.jpg

Lemon curd

ingredients

  • 3/4 cup freshly squeezed lemon juice

  • 1 cup sugar

  • 4 eggs

  • lemon zest (2 or 3 lemons)

  • 1 cup non-salted butter, cubed

directions

  1. In a medium saucepan, heat lemon juice, zest and 1/2 sugar until boiling.

  2. In a bowl, whip the remaining sugar with the 4 eggs until well combined.

  3. While whisking constantly, pour the hot lemon mixture into the sugar/egg mixture.

  4. Pour everything back into the pan and heat at medium/high heat. Continually whisk the mixture.

  5. Put the cubed butter in the bowl on an electric mixer.

  6. When bubbles start appearing in the lemon mixture, take it off the heat and pour it on top of the butter.

  7. Turn the electric mixer on at medium speed and whip until the butter has melted and is fully incorporated into the lemon mixture.

  8. Press a plastic wrap directly on the surface of the curd and refrigerate over night.

And that’s it! The next day, you have a delicious, creamy lemon curd that can be used for any dessert! Seriously, I could just sit and eat spoonfuls of this stuff.


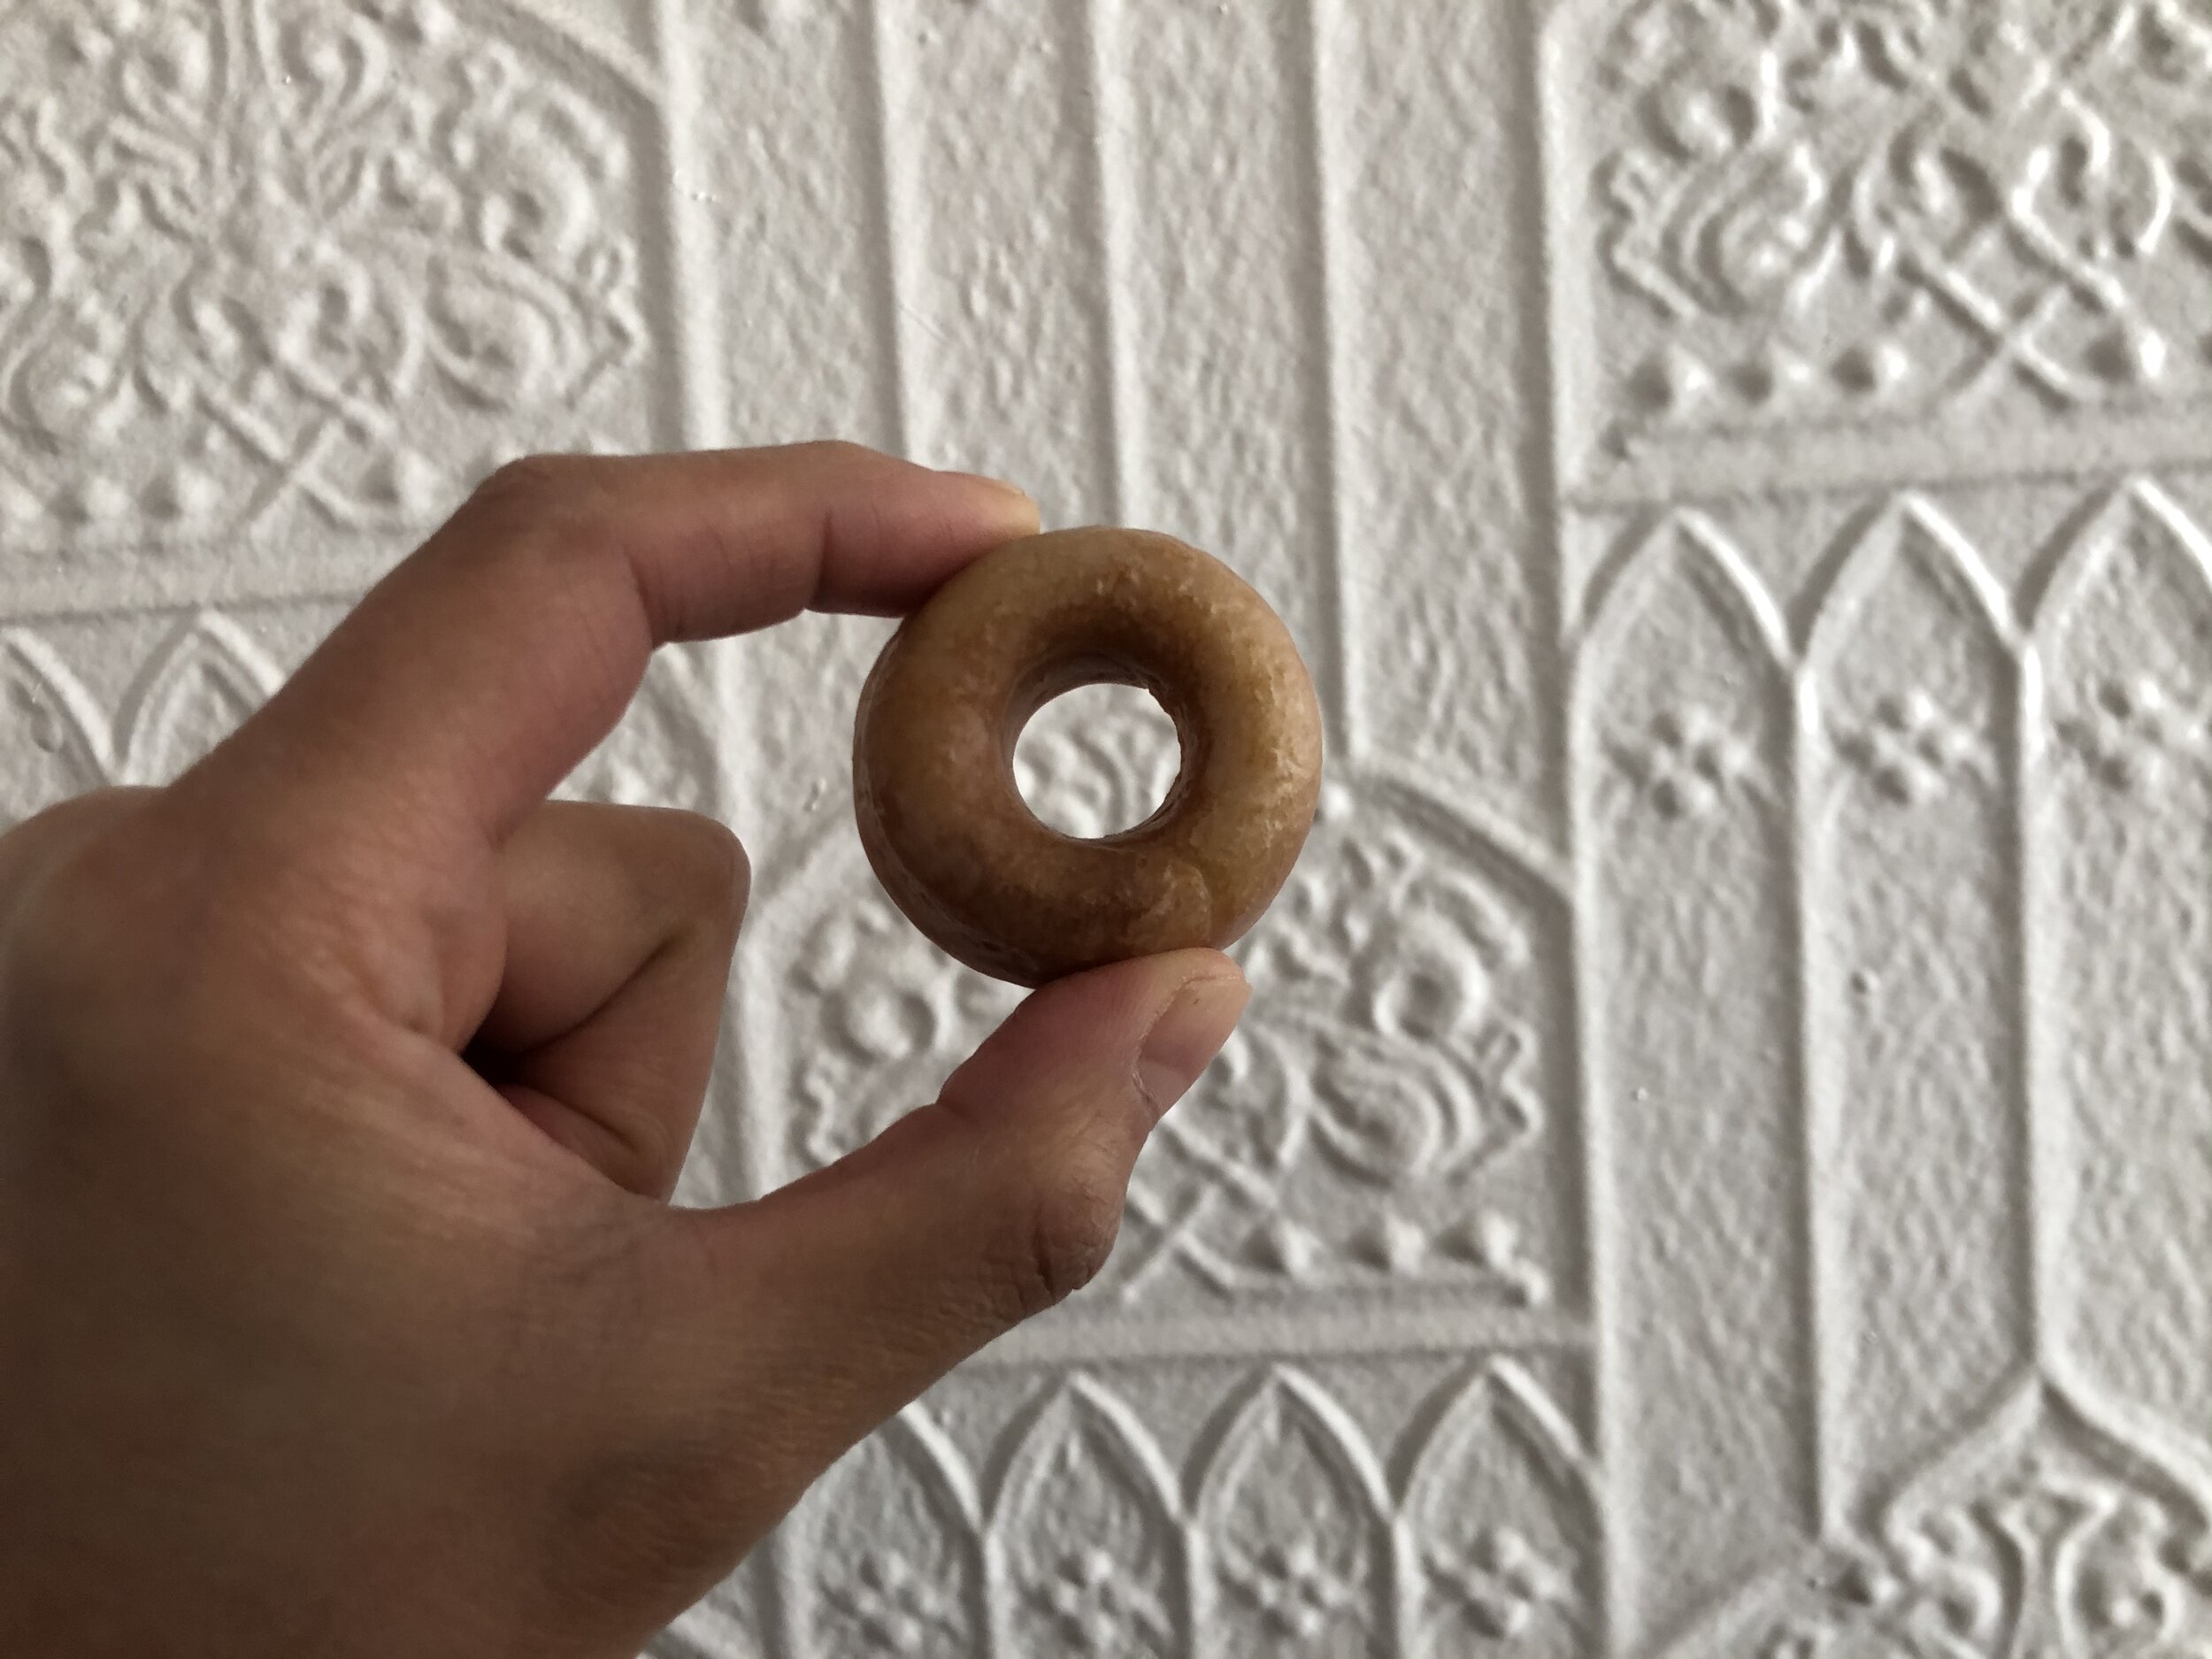
Mini baked sour cream donuts

I woke up the other day with a crazy craving for donuts. Unfortunately, there are no proper donut places nearby and since we are in the dead of winter, I really did not want to dress up and trek almost across town for the sole purpose of satisfying my cravings. It was easier to make them myself. That way, I get the flavor I want and I get to stay in pajamas!

The downside, though, is that I am absolutely terrified of deep frying! So, I had to resort to baking, which means that texture-wise, I would not get exactly what I had a hankering for. But that’s ok.

I’ve never really been into those extravagant, super colorful, hyper decorated donuts to begin with, so I was looking for something pretty simple and easy to make. I went for sour cream donuts. And, of course, me being me, I made them bite-size because a) they are way cuter than regular size donuts! and b) they take up twice as less time to bake!

IMG_6710.jpg

Mini baked sour cream donuts

Makes about 48 mini donuts

ingredients

  • 1/2 cup sour cream

  • 1 large egg

  • 1/2 tsp vanilla extract

  • 1/8 tsp almond extract

  • 1/4 cup canola oil (+ more to grease the mold)

  • 1/3 cup sugar

  • 1 cup all-purpose flour

  • 1/2 tsp baking soda

  • 1/4 tsp salt

  • a pinch of cinnamon (optional)

For the glaze

  • 1 1/4 cup powdered sugar

  • 1/4 cup milk

  • 1/4 tsp vanilla extract

  • 1/8 almond extract

directions

  1. Preheat oven at 350.

  2. Grease your mini donut mold.

  3. In a bowl, mix together sour cream, egg, vanilla extract, almond extract, canola oil and sugar, until combined. No need to use an electric mixer here. I mixed everything together using a spatula and it worked out fine!

  4. Sift in the flour, baking soda, salt and cinnamon. Mix until combined.

  5. Fill the mold only half-way. I used a piping bag with a small round tip to make filling the mold easier.

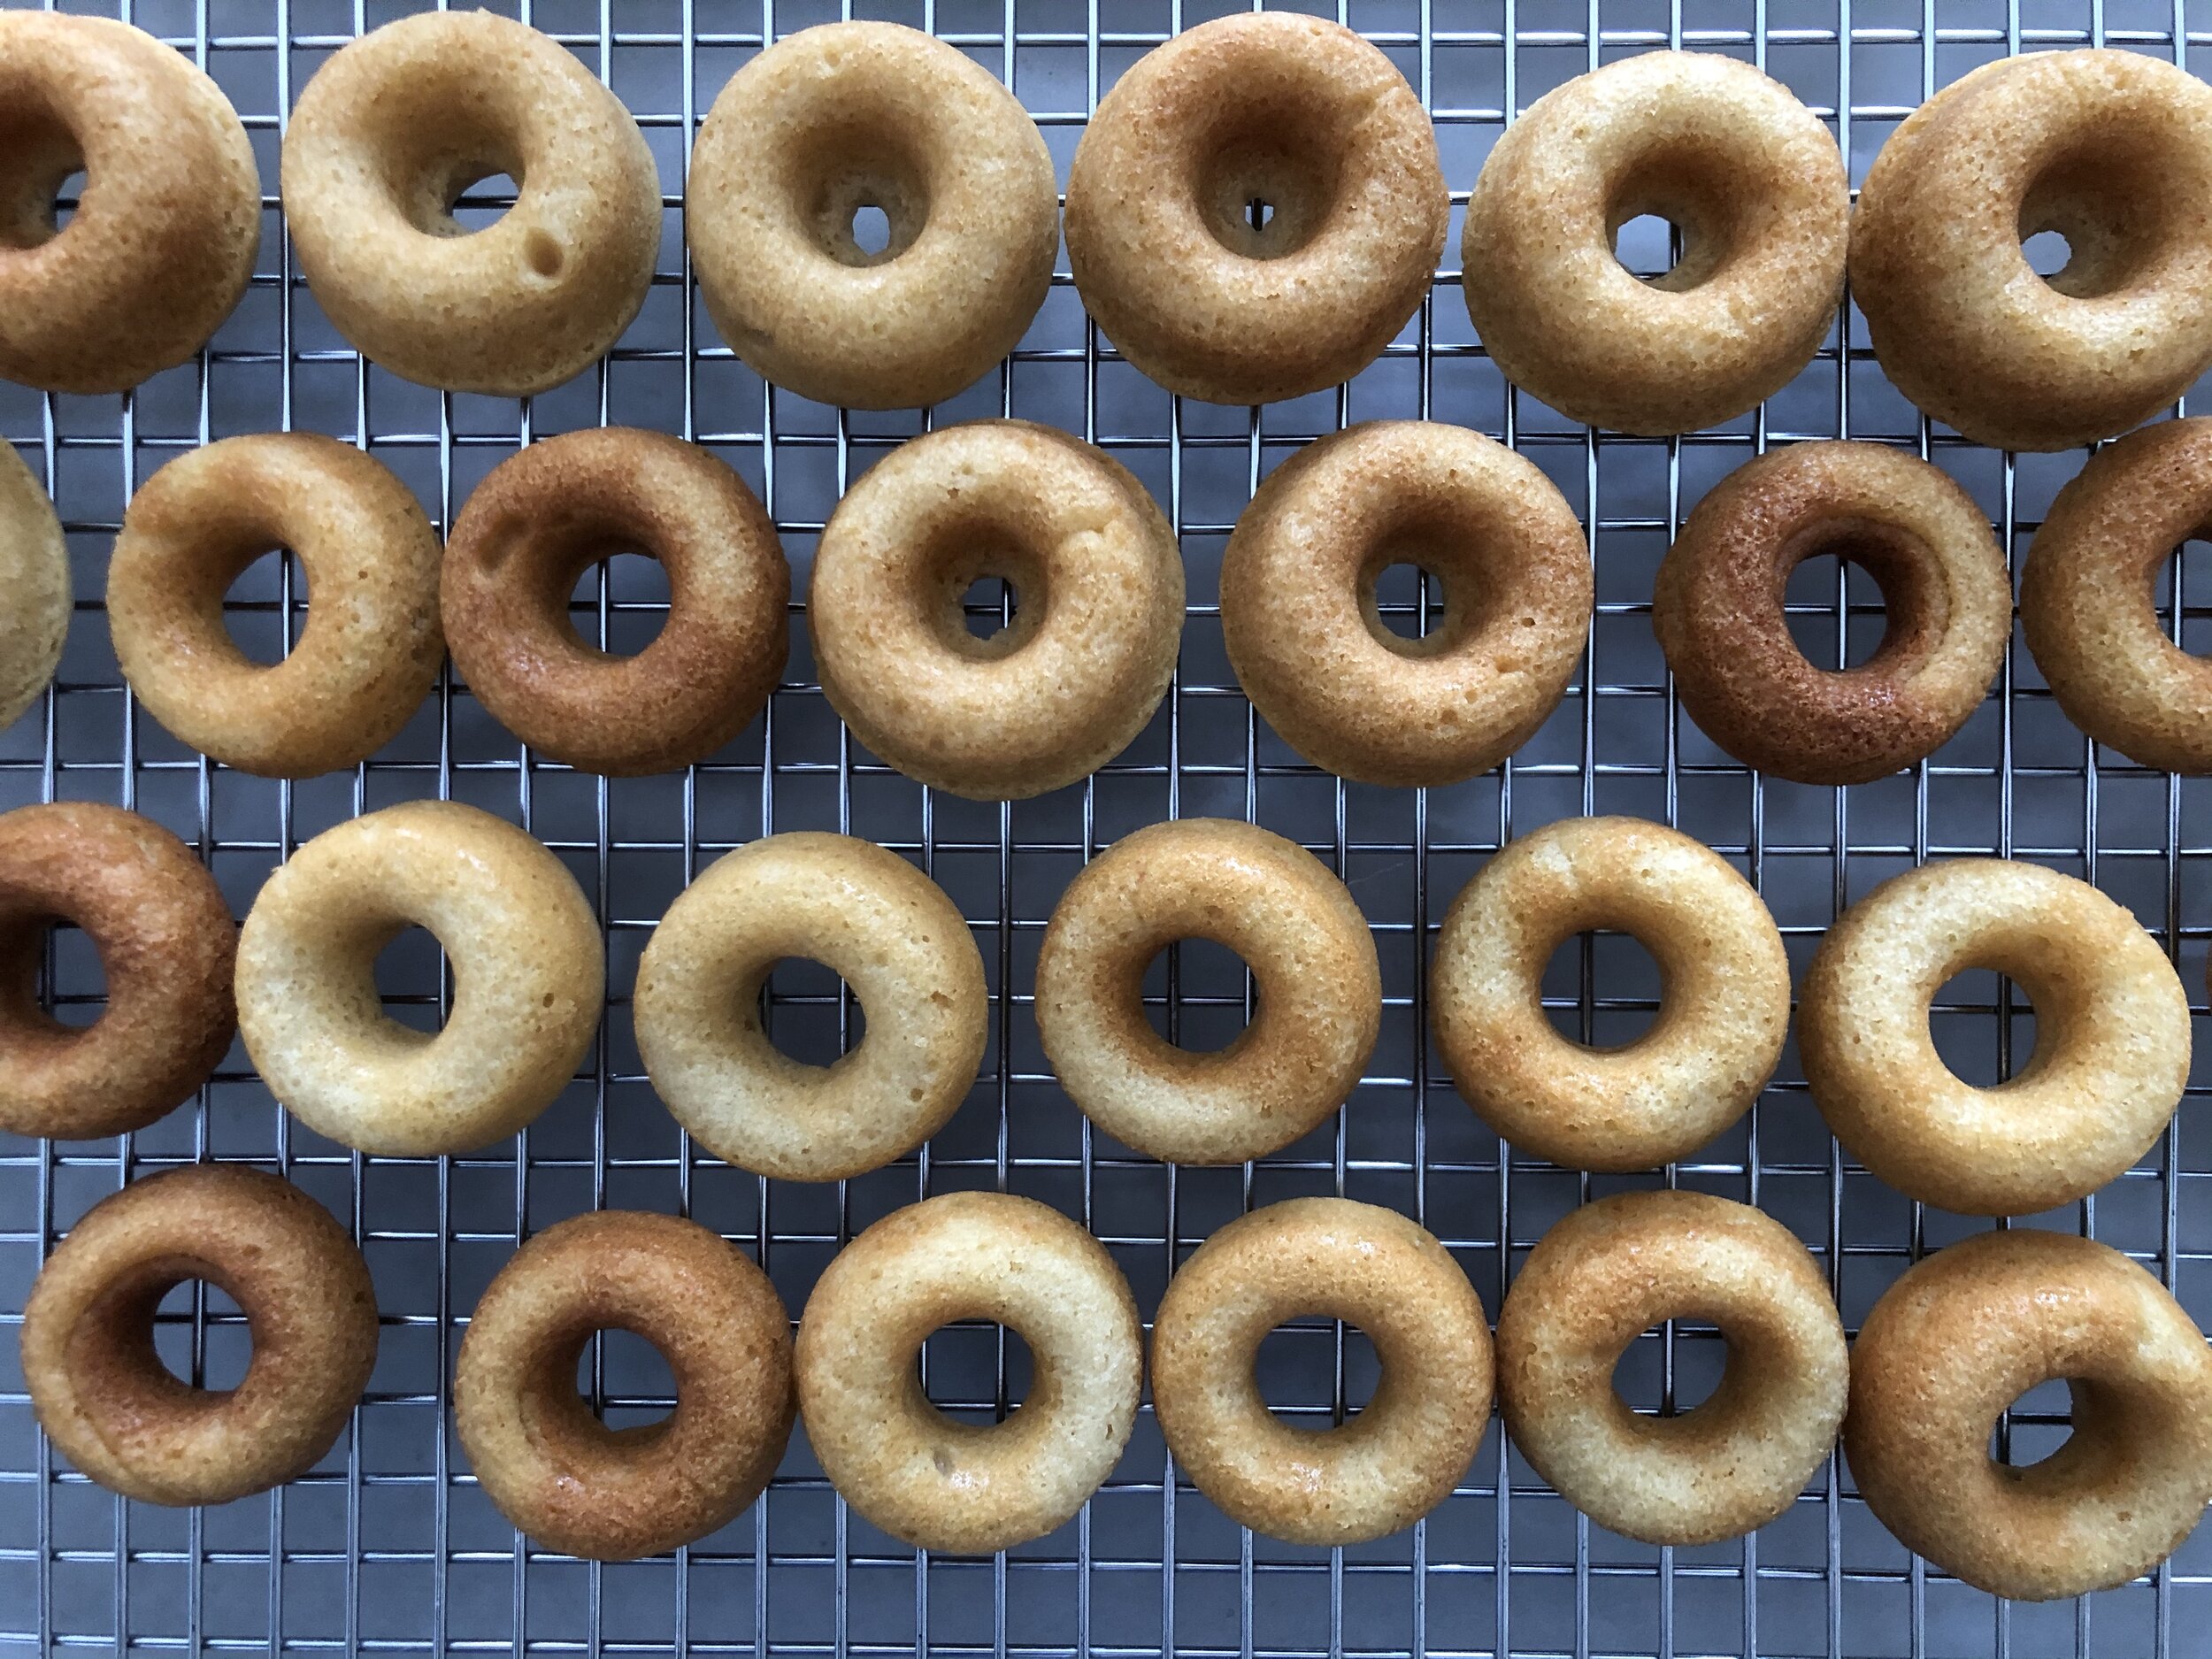
  6. Bake for 10 minutes or until the donuts are slightly golden on top.

  7. Let the donuts rest in the tin for 5 minutes before transferring them to a rack to cool completely.

  8. To make the glaze, combine the powdered sugar, milk, vanilla and almond extracts in a large bowl until well combined.

  9. Before covering the donuts with glaze, prepare your work area: put parchment paper on a big cookie sheet, then put a wire cooling rack on top. This prevents the glaze from trickling down on your counter top, and the parchment paper prevents you from having to wash the cookie sheet!

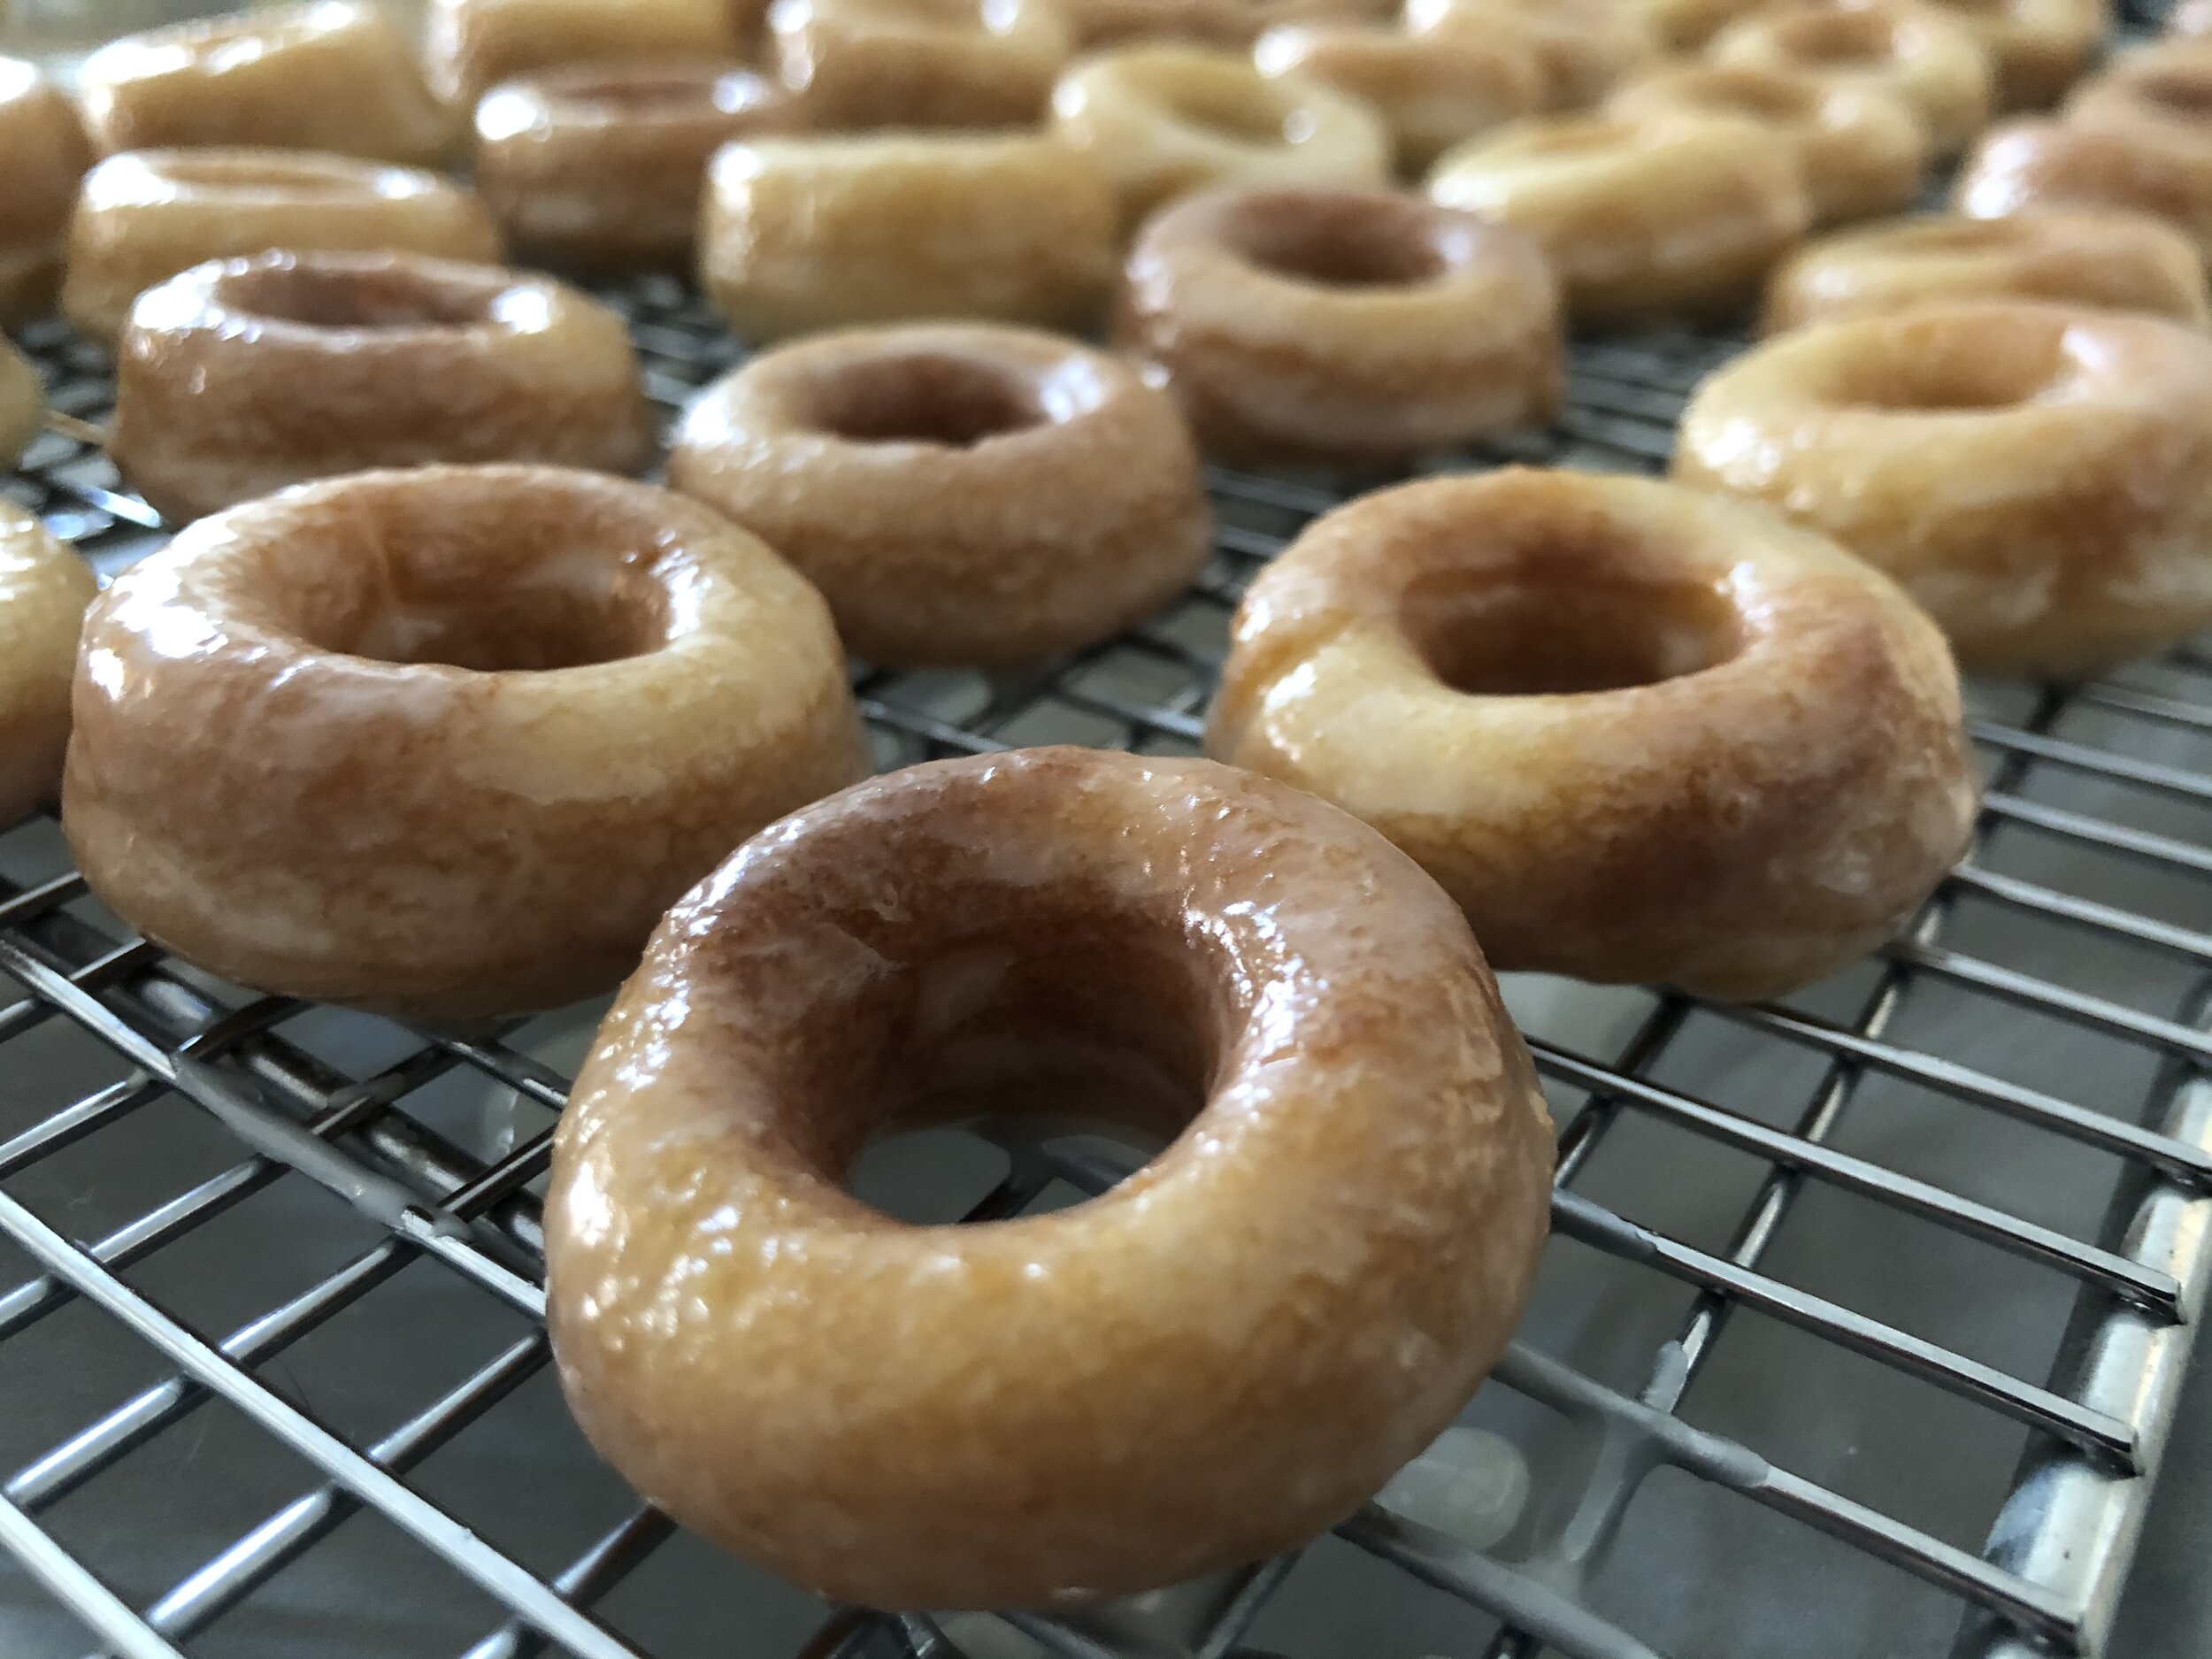
  10. Once you’re set up, dip the mini donuts in the glaze using a fork (see photo below). Let the donut rest on the fork a while to let the excess glaze drip down and back into the bowl before putting it on the rack.

  11. If you have some left-over glaze, dip the donuts back in for a double-glaze!

  12. Let the glaze set completely before enjoying the mini donuts.

That’s it! How easy was that? The hardest part was waiting for the glaze to set. This recipe makes about 48 mini donuts but they’re so tasty that you’ll gulp them down in no time! I was afraid I would only get donut-shaped cakes, but the result is actually pretty close to what I was craving! Texture-wise, they are quite close to old-fashioned donuts : a bit dense, but still moist. Needless to say that my hankering was completely satisfied!

This made me confident enough to explore more baked donuts recipes. I’ll keep you updated!

Lemons and Poppy Seeds

So I woke up this morning craving something sweet and lemony. Of course, the first thought that crossed my mind was poppy seeds. Why? Because lemons and poppy seeds, for some reason, make one hell of a team. I honestly cannot explain why I love this pairing so much. Is it the added texture that the poppy provides, or its subtle nutty flavor? I don’t know and I don’t plan on dwelling too much on the matter. Bottom line is, these two ingredients work together and help elevate each other.

Fortunately, I had everything I needed in my pantry so no need to change and go out. What is great here is that this recipe is really simple and doesn’t require too many ingredients (or too much effort for that matter!). I chose to make mini cakes because I love everything bite-size, and because baking time is reduced to only 15 minutes!

So is it a muffin or a cake that I’m making? Personally, I find that the only difference between cake and muffin is the presence of icing or frosting, or their lack thereof. If there’s icing or frosting, it’s a cupcake or a cake, depending on the size of your dessert. No icing or frosting means that it’s a muffin so you can eat it for breakfast without feeling judged. In this case, I used a thick lemony glaze. My point here is that you could use this recipe to make muffins or cakes, which is why I omitted mentioning either one of them in the title.

IMG_5643.jpg

Lemon/ poppy seed cakes

Makes 24 mini cakes or 6 muffin size cakes

ingredients

  • 1 1/4 cups flour

  • 1 tsp baking powder

  • 1/4 tsp salt

  • 2/3 cup sugar

  • 1 egg

  • 1/2 cup vegetable oil

  • 1/3 cup whole milk

  • 1 tsp vanilla

  • 1 tbsp poppy seeds

  • Lemon zest (2 lemons)

  • 1/2 sour cream

glaze (optional)

  • 1 1/2 cup powdered sugar

  • 1 1/2 tbsp whole milk

  • 1 1/2 tbsp lemon juice

  • 1 tsp poppy seeds

directions

  1. Preheat oven at 375 degrees.

  2. Place liners in muffin tin.

  3. In the bowl of an electric mixer fitted with the paddle attachment, mix sugar, egg, milk, oil and vanilla until well combined, about 2 minutes.

  4. Add poppy seeds and lemon zest. Continue mixing for a minute.

  5. In a separate bowl, sift together flour, baking powder and salt.

  6. Incorporate flour mixture into wet ingredients and fold with a spatula until everything is well combined.

  7. Add the sour cream and stir until incorporated.

  8. Spoon the batter evenly in the muffin tin.

  9. Bake for 15 minutes for mini cake, and 22 minutes for muffin size cakes, or until a toothpick inserted in the center comes out clean.

  10. Let the cakes rest in the tin for 5 minutes before transferring them to a rack to cool completely.

  11. While the cakes cool, prepare the glaze (optional).

  12. Mix all 4 ingredients (powdered sugar, poppy seeds, milk and lemon juice) in a bowl. Mix well until the mixture is no longer lumpy. Add more powdered sugar or liquid (lemon juice or milk) for the desired consistency.

  13. Pour a dollop of lemon glaze on cooled cakes.

The cakes are super moist, with a crunchy top which is the best! The lemon zest came through and each bite is full of flavor, while the poppy provides some added crunch. And, because I made mini cakes, they are bite=size and can be eaten like pop corn!!!

Variations

Instead of the glaze, you could also insert some lemon custard into the cakes. I opted for a glaze because I was feeling lazy, but the custard is definitely my preferred option.

If you’re not a fan of poppy seeds, you could make the same recipe with ground almonds. I personally find that lemon cakes taste better when there’s a contrasting nutty flavor that’s added. So mix together 1 cup of flour with 5 tbsp of ground almonds, and add 1/4 almond extract in the wet ingredients.

Also, the cakes are also packed with flavor so technically, they don’t really need anything else to improve their taste. You could eat them as they are and be completely satisfied. The up-side here is that if you choose to exclude any form of icing, frosting or custard, you could eat the cakes straight out of the oven!

Enjoy!


Easy and versatile chocolate cake

Chocolate cake is the ultimate comfort food, next to ice cream. Feeling down? There’s nothing better to drown your sorrows in than one of those two desserts. Even better, eat a chocolate cake with a scoop of ice cream on top! But I digress.

I have 2 chocolate cake recipes in my arsenal and they are both awesome and super easy to prepare, which is perfect because they allow me to rapidly whip up a dessert in no time, in case of emergency (surprise guests, a birthday I forgot about, or simply because I want to eat something chocolaty). The first recipe is Ina Garten’s Beatty chocolate cake, and like all of Ina Garten’s recipes, it’s strait forward, no-fail and fabulous! My other recipe is coconut milk-based. Though I adore Ina Garten’s chocolate cake, the coconut milk recipe is the one I go back to the most. It depends on what you feel like. If you prefer fluffy and moist chocolate cakes, go for Beatty’s. If you crave something a bit more dense, go for that coconut milk cake. Since I have a preference for denser cakes, I tend to lean towards the second recipe. It’s also very versatile so it allows me to make lots of variations of chocolaty desserts.

IMG_4832-cropped.jpg

Easy and versatile chocolate cake

Makes approx. 12-16 muffin-size cakes or lots of mini cakes

ingredients

  • 2 oz dark or semi sweet chocolate, finely chopped

  • 3/4 cup unsweetened cocoa powder

  • 3/4 cup boiling water

  • 6 tbsp butter, melted

  • 3/4 cup sugar

  • 2 eggs

  • 1 cup coconut milk

  • 1 1/4 cups all-purpose flour

  • 1 tsp baking soda

  • 1/2 tsp baking powder

  • 1/2 tsp salt

  • 1/4 tsp almond extract

  • Optional: 1/2 cup unsweetened coconut flakes, chocolate chips and/or nuts

directions

  1. Preheat oven to 350 degrees.

  2. Butter muffin pan or line with paper liners.

  3. Put chocolate and cocoa powder in a bowl and pour boiling water on top. Let the mixture stand a while, only stirring occasionally. Continue stirring every now and then until the chocolate has melted and the mixture is smooth.

  4. In another bowl, sift together flour, baking soda, baking powder and salt.

  5. In the bowl of an electric mixer with the paddle attachment on, beat butter and sugar until combined, about 2-3 minutes.

  6. Add eggs one at a time, mixing well after each addition.

  7. Add chocolate mixture and mix well, about 2 minutes.

  8. Add the flour and the coconut milk to the mixture in alternative steps, starting and ending with the flour. Mix until just combined.

  9. If you want to add coconut flakes, chocolates chips and/or nuts, fold them in.

  10. Pour batter into prepared pan.

  11. Bake for approximately 18-20 minutes, or until a toothpick inserted in the center comes out clean.

  12. Remove the pan from the oven and let it cool down. Then, carefully remove the cakes from the pan and transfer them on a wire rack so they cool completely.

For the frosting, I almost always opt for chocolate mousse. I have a great recipe that I always use and you can find it here. I find the airy dark chocolate mousse pairs very well with the fudgy and coconutty chocolate cake.

Variations

This chocolate cake is the base for a lot of my other chocolaty desserts: I use it for muffins, loaf cakes and more! It’s so versatile, that you get a whole different dessert with one or two minor changes! How awesome is that?

Chocolate banana bran muffin: I used the coconut milk chocolate cake recipe, added nuts, ripe bananas, 1 cup of rolled oats. Dusted sugar on top of the mixture before putting it in the oven, for a caramelized crunch.

Chocolate banana bran muffin: I used the coconut milk chocolate cake recipe, added nuts, ripe bananas, 1 cup of rolled oats. Dusted sugar on top of the mixture before putting it in the oven, for a caramelized crunch.

Chocolate loaf cake: basically the above recipe but baked in a loaf pan, with chocolate chips inside and on top.

Chocolate loaf cake: basically the above recipe but baked in a loaf pan, with chocolate chips inside and on top.

The “Bounty” cake: the above recipe but with a coconut macaroon center, just like the chocolate bar. Simple chocolate glaze on top to make it more decadent!

The “Bounty” cake: the above recipe but with a coconut macaroon center, just like the chocolate bar. Simple chocolate glaze on top to make it more decadent!

I sometimes like to put vanilla frosting on my chocolate cake. My favorite vanilla frosting recipe is made with cream cheese and I find its tartness fits extremely well with the chocolate flavor.

IMG_1393.JPG

You can simply add ingredients to the chocolate cake mixture and you can get a whole different dessert. So mix it up and have fun!

Enjoy!

My go-to chocolate frosting that's actually chocolate mousse

I tried to find a good alternative to buttercream frosting. For vanilla cakes, I have a fantastic cream cheese frosting that I can always depend on because it’s pretty much foolproof. But for chocolate cakes, I searched long and hard to find a great yet easy frosting recipe that is not buttercream or even worse, meringue buttercream. Don’t get me wrong, buttercream or meringue buttercream taste amazing and are a dream to pipe. That being said, they are way too sweet for my taste and my kitchen’s room temperature is just too unstable for a proper result. You see, if the room is too cold, the butter will harden and there will be no cream in your buttercream; just sweet, thick butter. If it’s too hot, the butter will melt too fast and the buttercream will curdle. My kitchen constantly fluctuates between too hot and too cold, which means that I always have to MacGyver my buttercream. When the kitchen’s too cold, I have to mix with a hair dryer aimed directly at the bowl. When it’s too hot, I have to mix, refrigerate, and mix again. Meringue buttercream requires a candy thermometer and I just refuse to go there. Candy thermometer requires a level of attention and precision that I’m just not willing to provide.

Then one day it dawned on me that frosting can be what ever we choose it to be. I have a great chocolate mousse recipe so why not use it as frosting? From that day on, whenever I make a chocolate cake, I use chocolate mousse as my go-to frosting. So far, it’s been a huge hit! And why shouldn’t it be? It’s chocolaty, light, not too sweet, airy yet thick enough to be very easily piped. Oh, and did I mention how easy it is to prepare this mousse frosting?

IMG_4830.JPG

My go-to chocolate frosting that’s actually chocolate mousse


ingredients

  • 1 1/2 cups heavy whipping cream

  • 4 large eggs, room temperature

  • 2 tbsp powdered sugar

  • 12 oz good dark chocolate

  • 1/4 unsalted butter, cubed

directions

  1. Whip the cream until firm and forms peaks. Set aside in the refrigerator.

  2. Whip eggs and sugar at medium/high speed until fluffy and thick, about 10 minutes.

  3. Melt the chocolate in the microwave (heat 30 seconds at a time, mix and heat again, to prevent the chocolate from burning).

  4. Mix butter in the chocolate until it’s all melted and the mixture is smooth.

  5. Add the chocolate mixture to the egg mixture and stir the whole thing by hand with a rubber spatula until fully incorporated.

  6. Fold in the chilled whipped cream. Continue folding until fully incorporated.

  7. Pipe on cake.

And voilà! How easy was that? Needless to say that for a better chocolate mousse, you must use the best possible chocolate. That being said, I regularly use the dark chocolate bars from the baking section of my supermarket and the result was just as great.

Enjoy!

Raspberry / Almond / Pistachio Friands

I haven’t baked much lately. There was a series of heat waves during summer, so I avoided turning my oven on at all cost, and then fall came and we took some time off to go on a much deserved vacation to Oahu. After we came back, it took us a while to get back into our regular routine…

However, the holidays are just around the corner and I am feeling energized again! I stumbled on Claire Ptak’s lovely friand recipe in her beautiful book The Violet Bakery Cookbook and had to try it right away. I love friands. They are packed with an intoxicating almond flavor and they are just so moist and delicious, not to forget, pretty easy to make!

If you are pressed for time during the holidays and need to impress with a dessert, these cakes are your solution: they are super tasty, easy and quick to make and the pistachio/raspberry green/red color combo couldn’t be any more christmas-y! Sprinkle a little powdered sugar on top and you’ve hit gold!

I had to adapt the recipe a little bit because I did not have everything on hand, and I did not exactly follow her exact instructions. Bellow is the recipe I made, but for Claire Ptak’s original recipe, check out her book!

IMG_0793.JPG

Raspberry / Almond / Pistachio Friands

Makes approx. 10 muffin size cakes

INGREDIENTS

  • 1/2 cup butter, melted, plus more to grease the mold

  • 5 egg whites

  • 1 tsp vanilla extract

  • 1/4 tsp almond extract

  • 2/3 cup all-purpose flour

  • 3/4 tsp baking powder

  • 1 cup ground almond

  • 1/2 cup ground pistachios

  • 1 cup powdered sugar, plus more to sprinkle the cakes

  • About 30 fresh raspberries

  • 3/4 cup slivered pistachios

DIRECTIONS

  1. Preheat oven at 320 degrees.

  2. Grease the mold of your choice. In this case, I used a regular muffin tin.

  3. Using In the bowl of an electric mixer fitted with the whisk attachment, beat the egg whites until light and fluffy.

  4. Switch to a paddle attachment and add the wet ingredients (melted butter, vanilla and almond extracts). Mix at medium speed until incorporated, about 1 minute.

  5. Add the dry ingredients (flour, baking powder, ground almond and ground pistachio) and mix until incorporated, about 1 or 2 minutes.

  6. Fill the muffin molds about 2/3 full with the batter.

  7. Insert 2 or 3 raspberries into each mold. Be careful not to break the raspberries!

  8. Sprinkle with slivered pistachios. Push them down a bit into the batter so they don’t fall out when the cakes rise.

  9. Bake for 17 to 20 minutes.

  10. Let the cakes rest in the tin for 5 minutes before transferring them to a rack to cool completely.

  11. Sprinkle the cake with some powdered sugar.

That’s it! How easy was that?

IMG_0784.JPG

Don’t like pistachios or raspberries? That’s fine! You can simply replace them with whatever you like: chocolate chips, another fruit like cranberries, nectarines, apple or pear, or another nut like hazelnut. Once you get the base of the recipe, you can pretty much adapt to your taste.

In this case, I find the colors of the cake very festive without being tacky. It’s simple, elegant and delicious!

Enjoy!